A Beginner’s Guide to Single Pole Double Throw Relay Diagrams
A single pole double throw relay diagram shows you how to connect and control devices using a special type of relay. This re

A single pole double throw relay diagram shows you how to connect and control devices using a special type of relay. This relay lets you switch one electrical path between two outputs. You often use these diagrams to solve real-world problems like:
- Home automation, such as turning lights or fans on and off
- Motor control in machines
- Security systems in buildings
- Automotive electronics
- Projects using microcontrollers like Arduino or Raspberry Pi
You can trust SPDT relays for reliable switching in many electronic circuits. Learning to read these diagrams helps you wire and troubleshoot with confidence.
Key Takeaways
- SPDT relays switch one input between two outputs, making them ideal for automation and control tasks.
- Understanding the key components of SPDT relays, like terminals and control inputs, helps you wire circuits safely.
- Always check the pin configuration before wiring to avoid mistakes and ensure your circuit functions correctly.
- Use SPDT relays in projects with microcontrollers like Arduino for effective control of devices and systems.
- Familiarize yourself with relay symbols and notation to read diagrams accurately and troubleshoot effectively.
Single Pole Double Throw Relay Diagram
Key Components
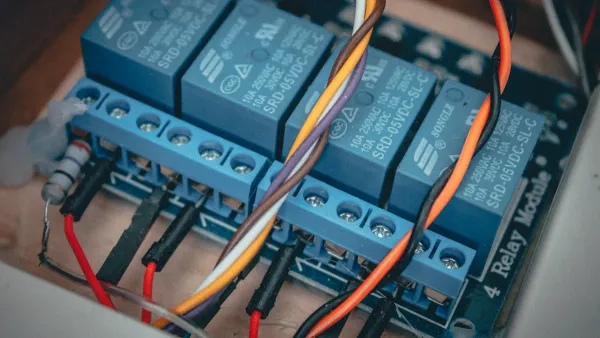
When you look at a single pole double throw relay diagram, you see several key components that help you understand how the relay works in electronic circuits. Each part has a specific job. Here is a table that shows the main components and their functions:
| Component | Function |
|---|---|
| Terminals | An SPDT relay has three terminals for output connections and two for the coil. |
| Control Input | Controls the switching between the two output terminals. |
| Normally Closed (NC) | One output terminal is NC when the relay is not energized. |
| Normally Open (NO) | The other output terminal is NO when the relay is not energized. |
You use these key components to control the flow of electricity in your circuit. The relay lets you switch between two outputs, making it very useful in many electronic projects. You often find the single pole double throw relay diagram in integrated circuits and control systems.
Tip: Always check the key components in your relay before wiring. This helps you avoid mistakes and keeps your circuit safe.
Pin Configuration
You need to know the pin configuration to connect your SPDT relay correctly. The single pole double throw relay diagram shows you how each pin works. Here is a table with the standard numbering system for SPDT relay pins:
| Terminal Number | Function |
|---|---|
| 11 | C |
| 12 | NC |
| 14 | NO |
| A1 | Coil (+) |
| A2 | Coil (-) |
You will see these numbers on most relays. The center pin (C) connects to the moving part inside the relay. The NC and NO pins connect to the two outputs. The coil pins (A1 and A2) let you control the relay with a small voltage.
- The SPDT relay can control one circuit with two positions, switching between two outputs.
- In contrast, an SPST relay only connects or disconnects a single circuit.
- A DPST relay can control two circuits but only in one position.
You should always check the pin configuration before wiring. The identification system for automotive relay terminals uses DIN 72552. This system gives each pin a number, making it easier to follow the single pole double throw relay diagram.
Functionality
The functionality of a single pole double throw relay lets you switch one input between two outputs. When you apply voltage to the coil, the relay moves the connection from the NC terminal to the NO terminal. This action changes the path of electricity in your circuit.
You use the single pole double throw relay diagram to see how the relay switches between two circuits. The relay works like a mechanical switch, but you control it with electricity. This makes it perfect for automation, safety systems, and integrated circuits.
You can use the relay to turn devices on or off, change the direction of a motor, or select between two signals. The functionality of the SPDT relay gives you flexibility in your designs. You can trust the relay to work in many different situations.
Note: The single pole double throw relay diagram helps you understand how the relay switches between outputs. This knowledge is important for building and troubleshooting electronic circuits.
You will find that the functionality of the SPDT relay makes it a popular choice in electronic components and integrated circuits. You can use it in home automation, automotive electronics, and many other applications. The single pole double throw relay diagram gives you a clear view of how the relay operates and how you can use it in your projects.
How Does an SPDT Relay Work
Switching Mechanism
You often ask, "how does an spdt relay work?" The answer starts with the switching mechanism. The spdt relay uses three terminals: one input and two outputs. This setup lets you direct current from the input to either output, depending on the relay's position. You use this mechanism to switch current between two circuits or loads. The relay acts as a bridge, moving the connection from one output to another.
When you energize the electromagnetic coil inside the relay, it generates a magnetic field. This field moves the armature, which is a small metal lever. The armature connects or disconnects the circuit. You can see this process in action:
- The electromagnetic coil creates a magnetic field when you apply voltage.
- The magnetic field pulls the armature, causing the relay to switch positions.
- The relay toggles between two loads or states, depending on whether the coil is powered.
You control the relay by turning the coil on or off. When the coil is inactive, the common pole (C) connects to the normally closed (NC) terminal. When you power the coil, the common pole switches to the normally open (NO) terminal. This switching action lets you change the path of electricity in your circuit.
You use the spdt relay to switch between two outputs, making it perfect for applications where you need to redirect current. This mechanism is essential in electronic components and integrated circuits.
The electromagnetic coil in the relay is crucial for opening or closing the circuit. When current flows through the coil, it creates a magnetic field that pulls the switch arm away from one contact or pushes it down to close the switch. You rely on this process to control devices, motors, and other loads in your projects.
Power Source and Load Switching
You use the spdt relay to switch power between different loads. The relay directs current to one of two outputs, enabling you to change circuits easily. You can control lights, motors, or other devices by switching the relay. This ability makes the spdt relay valuable in integrated circuits and electronic components.
Here is a table that shows how load switching works and what safety measures you should consider:
| Aspect | Description |
|---|---|
| Load Switching Mechanism | The spdt relay directs current to one of two outputs, enabling circuit changeover. |
| Electrical Arcing | Occurs during contact transfer, especially with DC loads, leading to potential contact wear. |
| Contact Protection Measures | Use of materials like AgW or AgCu and protective circuits to mitigate contact transfer issues. |
You must pay attention to electrical arcing when switching loads. Arcing happens when the relay contacts move from one position to another, especially with DC loads. This can cause wear on the contacts over time. You can protect the relay by using contacts made from materials like silver tungsten (AgW) or silver copper (AgCu). You can also add protective circuits to reduce contact wear.
You control the relay by applying voltage to the coil. When you switch the relay, you change the flow of electricity between two outputs. This switching action lets you automate devices, change motor direction, or select between signals. You use the spdt relay in many electronic projects because it gives you reliable switching and control.
Tip: Always check the relay's specifications before wiring. Make sure you use the right voltage and contact materials for your application. This helps you avoid common problems and keeps your circuit safe.
You see spdt relays in home automation, automotive electronics, and integrated circuits. You use them to switch loads, control devices, and automate systems. The switching mechanism and load switching features make the spdt relay a key component in electronic circuits.
Reading the Diagram
Symbols and Notation
When you read a relay diagram, you see special symbols that help you understand how the spdt relay works in electronic circuits. Each symbol shows a different part of the spdt relay. You need to know these symbols to follow the diagram and wire your circuit correctly.
Here is a table that shows the standard symbols and what they mean in a spdt relay diagram:
| Symbol | Description |
|---|---|
| SPDT Switch | Shows the single pole double throw switch in the relay |
| Common Terminal | The main terminal where current enters the relay |
| Traveler Terminals | The two terminals that connect to the load or device |
| Ground Pin | Sometimes shown in North American diagrams for extra safety |
You often see these symbols in relay diagrams for electronic components and integrated circuits. The spdt relay symbol usually has one line (the pole) that moves between two contacts. The common terminal connects to either the normally open or normally closed terminal, depending on the relay state.
You also need to recognize the coil symbol. The coil activates the relay and lets you switch between the two outputs. The diagram may show the coil as a rectangle or a loop. The spdt relay diagram uses these symbols to make wiring and troubleshooting easier.
Tip: Always check the legend or key on the relay diagram. This helps you match each symbol to the correct part of the spdt relay.
Step-by-Step Guide
You can read a spdt relay diagram by following a few simple steps. This helps you identify each terminal and wire your circuit safely. Here is a basic example of an spdt relay diagram for beginners:
      +12V
        |
       [Coil]
      A1   A2
       |    |
      ---  ---
       |    |
      (C)---(NC)
       |
      (NO)
Follow these steps to interpret the spdt relay diagram:
- Find the coil terminals. In most spdt relays, you see pins labeled A1 and A2. These connect to the control voltage.
- Locate the common terminal (C). This is the moving part inside the relay. It connects to either the normally open or normally closed terminal.
- Identify the normally closed (NC) terminal. When the relay is off, the common terminal connects to NC.
- Identify the normally open (NO) terminal. When you power the coil, the common terminal switches to NO.
- Check the pin numbers. Many spdt relays use numbers like 11 (C), 12 (NC), and 14 (NO). This helps you match the diagram to the actual relay.
- Look for traveler terminals. These connect to the load or device you want to control.
- Make sure you see the ground pin if your relay diagram includes it. Some diagrams show this for extra safety.
You can use this process for both 4-pin and 5-pin spdt relays. In a 4-pin relay, you have two coil pins and two switching pins. In a 5-pin relay, you get an extra pin for both NO and NC connections. Always check the relay diagram before wiring your electronic components or integrated circuits.
Note: If you mix up the coil and switching pins, your spdt relay will not work as expected. Double-check the diagram and pin numbers before you start wiring.
Wiring Guide

Connection Steps
Wiring a single pole double throw relay in your electronic circuit can seem tricky at first, but you can follow a clear process. You need to know how to connect and wire an spdt relay to make sure your project works safely and reliably. Here are the steps you should follow:
- Identify the relay pins. The bottom right pin connects to the center pole of the spdt relay.
- Attach the top left pin to the Normally Open (NO) contact.
- Connect the top right pin to the Normally Closed (NC) contact.
- When the relay is not powered, the bottom right pin links to the top right pin. When you energize the relay, the bottom right pin switches to the top left pin.
- For circuit integration, break the line wire and connect relay pins #2 and #5 inline. Keep the neutral wire connected.
- Pin #5 should go to your load, and pin #2 should connect to your power source.
- Supply the correct voltage to the coil. Most relays use 5V, 6V, 12V, or 24V. Make sure your power source can provide at least 100 mA for the coil.
⚡ Tip: Always double-check the voltage rating for your relay. Using the wrong voltage can cause the relay to fail or overheat.
Knowing how to connect and wire an spdt relay helps you avoid mistakes and keeps your electronic components safe. You can use this method for integrated circuits and other projects that need reliable switching.
Common Mistakes
Many beginners face common issues and troubleshooting methods for spdt relays. You can avoid these problems by learning what to watch for:
- Misinterpreting symbols on the relay diagram can lead to incorrect wiring.
- Missing connections or junctions may interrupt the circuit and create hazards.
- Using the wrong wire size can cause overheating or poor performance.
- Overlapping wires and components in your layout can make mistakes more likely.
- Poor labeling leads to confusion during troubleshooting.
- Skipping a final review often results in overlooked errors.
If you run into problems, use these troubleshooting tips:
- Replace old or worn-out relays to keep your circuit reliable.
- Clean the relay to remove dust or debris that could block connections.
- Check if your relay matches the environmental conditions, such as temperature or moisture.
- Verify that your relay receives the correct voltage and current. Use fuses to protect against excess power.
- Inspect for burnt coils and replace the relay if you see burn marks or infinite resistance.
- Prevent corrosion by choosing relays rated for chemicals or moisture.
🛠️ Note: Careful wiring and regular troubleshooting help you get the best performance from your spdt relay in electronic components and integrated circuits.
Understanding how to connect and wire an spdt relay, along with knowing common issues and troubleshooting methods for spdt relays, gives you the confidence to build and repair circuits with ease.
Relay Types Compared
SPDT vs SPST
You often see SPDT and SPST relays in electronic components and integrated circuits. Both relay types help you control circuits, but they work in different ways. SPST relays let you turn a single circuit on or off. SPDT relays give you more flexibility by switching one input between two outputs. This difference matters when you design circuits for automation or control.
Here is a table that shows how each relay works:
| Relay Type | Functionality Description |
|---|---|
| SPST | Can only connect or disconnect a single circuit. |
| SPDT | Can switch between two different output circuits. |
You use SPST relays for simple tasks, like turning a light on or off. SPDT relays work better when you need to choose between two states, such as switching a signal path or controlling two devices with one input. You often find types of spdt relays in projects that need more than basic switching.
When you look at applications, you see more differences:
| Relay Type | Functionality | Typical Applications |
|---|---|---|
| SPST | Simple on/off control of a single circuit | Basic switching tasks |
| SPDT | Connects a single pole to one of two circuits | Applications requiring switching between two different states |
You use spdt relays in pcb manufacturing to create circuits that need to switch between two outputs. You also consider design considerations for integrating spdt relays in pcbs, especially when you want to test relay functionality in pcb prototypes.
Tip: Choose SPDT relays when your project needs to switch between two outputs. Use SPST relays for basic on/off control.
SPDT vs DPDT
You may wonder how SPDT relays compare to DPDT relays. SPDT relays switch one circuit between two outputs. DPDT relays control two circuits at the same time, each with two output options. This makes DPDT relays more versatile for complex tasks in electronic components and integrated circuits.
Here is a table that highlights the differences:
| Relay Type | Circuit Control | Output Options | Versatility |
|---|---|---|---|
| SPDT | One circuit | Two options | Limited |
| DPDT | Two circuits | Four options | High |
DPDT relays let you reverse motor polarity or manage dual outputs. You use them when you need to control two independent circuits with one signal. SPDT relays in pcb manufacturing work well for moderate switching needs. DPDT relays suit high-complexity designs.
When you compare advantages and disadvantages, you see:
| Relay Type | Description |
|---|---|
| SPDT | Switches one circuit between two output options. |
| DPDT | Controls two circuits with two states each. |
- DPDT relays cost more than SPDT relays for simple jobs.
- DPDT relays may not work well in high-traffic systems or where you need detailed diagnostics.
You must think about complexity, current and voltage ratings, and reliability when you choose between relay types. Here is a quick guide:
- Complexity and Functionality: Use SPDT relays for moderate switching. Use DPDT relays for complex tasks.
- Current and Voltage Ratings: Make sure the relay matches your circuit needs.
- Durability and Reliability: Pick high-quality relays to reduce downtime.
You test relay functionality in pcb prototypes to make sure your design works as planned. You also review design considerations for integrating spdt relays in pcbs to avoid mistakes.
Note: Always match the relay type to your application. This helps you build reliable and efficient electronic circuits.
You learned how SPDT relay diagrams help you control circuits in electronic components and integrated circuits. These relays switch between two outputs and use multiple contacts for reliable operation.
| Key Points | Description |
|---|---|
| Functionality | Switches between two circuits for automation. |
| Reliability | Works in energy, automotive, and smart systems. |
| Versatility | Used in many industries and applications. |
SPDT relays support automation, energy efficiency, and smart technology. Try using them in your next project, and explore other relay types for even more possibilities!
FAQ
What does SPDT stand for in a relay?
SPDT means Single Pole Double Throw. You use this relay to switch one input between two outputs. This type of relay appears often in electronic circuits and integrated circuits.
How do you test if an SPDT relay works?
You can use a multimeter. Set it to continuity mode. Check the connection between the common terminal and both NO and NC terminals. When you power the coil, the connection should switch.
Can you use an SPDT relay with microcontrollers?
Yes, you can. Microcontrollers like Arduino or Raspberry Pi can control SPDT relays. You connect the relay coil to a digital output pin using a transistor for safe switching.
Why do relays have NC and NO contacts?
NC stands for Normally Closed. NO stands for Normally Open. You use these contacts to control which circuit path is active. This feature gives you more options in your electronic designs.
What happens if you wire an SPDT relay incorrectly?
Incorrect wiring can cause the relay to fail or damage your circuit. Always check the relay diagram and pin numbers before connecting. > Tip: Double-check your connections to keep your electronic components safe.