Simple Steps to Measure Resistance with a Multimeter
You can measure resistance easily by using a multimeter. When you check resistor with multimeter, you make sure your resisto
You can measure resistance easily by using a multimeter. When you check resistor with multimeter, you make sure your resistor works as expected. Accurate readings matter for safe and reliable electronics work. If you want to test a resistor, always power off the circuit first. You should check resistance only with safety in mind. This step-by-step guide will help you feel confident with resistor testing every time.
Key Takeaways
- Always power off the circuit before measuring resistance. This step ensures safety and prevents inaccurate readings.
- Use a digital multimeter set to the ohms (Ω) mode for accurate resistance measurements. Check the accuracy rating of your multimeter for best results.
- Make strong connections between the multimeter probes and the resistor. Good contact is essential for reliable readings.
- Regularly test resistors to identify faulty components and maintain circuit performance. This practice helps prevent future issues.
- Follow a step-by-step guide for resistor testing. This approach minimizes mistakes and boosts your confidence in electronics work.
Why Measure Resistance
Importance in Circuits
You work with resistors every time you build or repair electronic circuits. Resistors control how much current flows through a circuit. When you measure resistance, you make sure each resistor matches the value you expect. Sometimes, the actual value of a resistor changes because of manufacturing tolerances. You need to confirm the real resistance, especially in high-precision circuits. Accurate resistor testing helps you avoid problems with circuit performance.
Tip: Always use a step-by-step guide when you measure resistance. This helps you catch mistakes early and keeps your electronics safe.
You also check resistance to spot faulty components. A resistor that does not match its labeled value can cause errors or even damage other parts. Measuring resistance lets you find weak connections or damaged insulation. You keep your circuit safe and efficient by checking each resistor.
Here are some main reasons to measure resistance in circuits:
- You confirm the actual value of a resistor.
- You ensure high-precision circuits work as designed.
- You identify faulty or damaged components.
- You diagnose issues like weak connections.
When to Check Resistance
You check resistance during several stages of electronics work. Before you install a resistor, you test it to make sure it meets your needs. After you finish building a circuit, you measure resistance again to verify everything works. If your circuit stops working or acts strangely, you use resistor testing to find the problem.
You also measure resistance when you repair or upgrade old devices. High resistance can limit current flow, which protects your circuit but may cause power loss as heat. You want to keep components within safe limits. Regular resistor testing helps you maintain safety and efficiency.
Here are common times to check resistance:
- Before installing a resistor in a new project
- After assembling a circuit
- When troubleshooting circuit problems
- During routine maintenance or repairs
Tools to Test a Resistor
Multimeter Setup
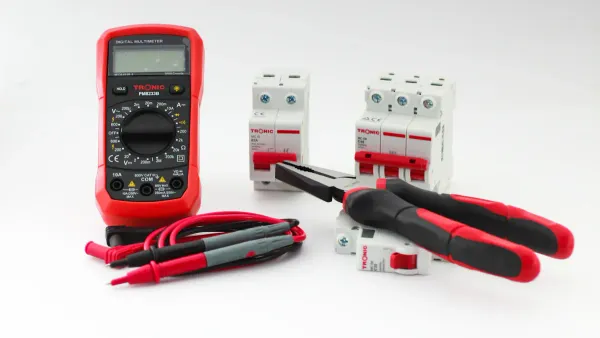
You need the right tools for accurate resistor testing. The most common tool is a digital multimeter. This device lets you measure resistance quickly and safely. When you want the best accuracy, you should know that not all multimeters are the same. Some models give you more precise readings than others. Here is a table that shows the accuracy of different types of multimeters:
| Type of Multimeter | Accuracy Specification |
|---|---|
| Portable Digital | ±0.5% |
| Benchtop | ±0.01% or better |
A benchtop model gives you the highest accuracy. For most home projects, a portable digital multimeter works well. You can use either one for resistor testing, but always check the accuracy rating before you start.
Besides using a multimeter, you may need other tools for special tasks. Here are some extra tools that help with resistor testing:
- Ohmmeter: Measures resistance with high precision.
- Micro-ohmmeter: Useful for very small resistance values.
- Kelvin bridge: Helps with low resistance measurements.
- Megohmmeter: Checks high resistance, often in insulation.
Workspace Preparation
You get better results when you prepare your workspace. Start by making sure your area is clean and bright. Remove any clutter that could get in your way. Good lighting helps you see the resistor and the multimeter display clearly.
Follow these steps to set up for resistor testing:
- Prepare your workspace. Make sure it is clean and well-lit.
- Set up the digital multimeter. Turn it off and set the dial to the resistance (Ω) mode.
- Connect the probes to the resistor. Place one probe on each end.
- Test the resistor. Do not let the probes touch each other. Change the range if needed for a clear reading.
- Switch off the multimeter and disconnect everything when you finish.
Tip: Always double-check your connections before using a multimeter. This helps you avoid mistakes and keeps your readings accurate.
You can now start resistor testing with confidence. A good setup makes the process smooth and safe.
Safety Before You Check Resistor with Multimeter
Before you start resistor testing, you need to focus on safety. You protect yourself and your equipment when you follow these steps. Safety always comes first, and it helps you get accurate results every time you check resistance.
Power Off the Circuit
You must turn off the power before you test any resistor. Measuring resistance in a powered circuit can cause several problems:
- You may get inaccurate readings because of leakage voltages.
- The multimeter can suffer permanent damage if exposed to external voltages.
- You risk burning circuit components if you place probes incorrectly.
- You increase your chance of electric shock or burns.
- High-power amplifiers can fail if you inject voltage during resistor testing.
Tip: Always unplug or switch off your device before you check resistance. This simple step keeps you safe and protects your tools.
Turning off the power is not just best practice. It is necessary for reliable resistor testing. You avoid costly mistakes and keep your workspace safe.
Discharge Components
After you power off the circuit, you need to discharge any components that may hold a charge. Capacitors and other parts can store electricity even after you turn off the power. If you skip this step, you may get inaccurate results or even damage your multimeter.
Discharging components helps you remove leftover voltage from the circuit. This step makes sure your resistor testing gives you correct readings. You also lower the risk of electric shock. When you discharge components, you avoid errors that can affect the reliability of your test results.
Note: Use a resistor or a discharge tool to safely release stored energy from capacitors before you check resistance.
You make resistor testing safer and more accurate when you follow these steps. Always remember to power off and discharge before you begin. These habits help you work confidently and protect your equipment.
Set Up to Measure Resistance
Select Ohms Mode
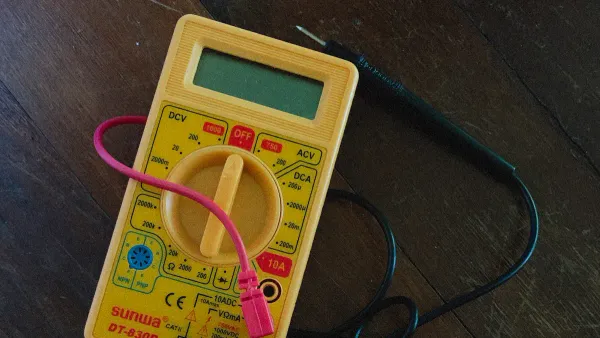
You need to set your multimeter to the correct mode before you measure resistance. This step helps you get accurate results and keeps your resistor testing safe. Every multimeter has a dial or button that lets you choose the function you want. To measure resistance, you must set to ohms. The ohms symbol looks like a horseshoe (Ω).
Follow these steps to prepare your multimeter for resistor testing:
- Disconnect the resistor from any live circuit. This step keeps you safe and prevents false readings.
- Turn the dial on your multimeter to the ohm meter function. Look for the Ω symbol.
- Insert the probes into the correct jacks on your multimeter. Usually, the black probe goes into the COM port, and the red probe goes into the port marked with Ω.
- Adjust the range if your multimeter does not have auto-ranging. Start with the highest range, then lower it until you get a clear reading.
Tip: Always double-check that your multimeter is set to ohms before you begin measuring resistance. This habit helps you avoid mistakes.
Insert Multimeter Leads
Proper placement of the multimeter leads is important when you measure resistance. You want to make sure you get a true reading from the resistor. If you touch the tips of both leads together, you can create a path for current that does not go through the resistor. This mistake can give you the wrong value.
Keep these points in mind when you insert the leads:
- Do not touch the metal tips of both test leads at the same time.
- Make sure at least one lead touches only the resistor you want to test.
- If the resistor is part of a larger circuit, disconnect one end to isolate it.
- Always measure resistance on a circuit that has no power.
When you follow these steps, you make resistor testing more reliable. You also protect your multimeter from damage. Using a multimeter the right way helps you measure resistance with confidence every time.
How to Test a Resistor
Connect Probes to Resistor
You want to check resistor with multimeter for accurate results. Start by making sure your resistor is not connected to any power source. Place the resistor on a clean, flat surface. Hold the multimeter probes in your hands. You need to connect probes to each end of the resistor. This step lets you measure resistance directly.
When you test a resistor, strong connections matter. If you use weak or loose connections, you may get wrong readings. Try to make mechanical connections as strong as possible. Soldered connections work best for low impedance resistors. If you use clip leads, make sure they grip the resistor firmly.
Tip: Keep ground leads short. Short leads help reduce noise and improve accuracy when you check resistor with multimeter.
Here are best practices for connecting probes to a resistor:
| Best Practice | Description |
|---|---|
| Use 1M input impedance probes | Non-invasive setup with good bandwidth for measurements. |
| Minimize connection resistance | Strong connections lower induced resistance for better accuracy. |
| Keep ground leads short | Short leads reduce inductance and noise in your measurements. |
- Mechanical connections should be strong to minimize resistance.
- A weak connection can introduce significant measurement errors.
- Soldered connections are preferable for low impedance.
If you use long ground leads, you may see extra noise or ringing on your readings. Always keep leads as short as possible. This habit helps you test a resistor with confidence.
Read the Display
After you connect probes, look at the multimeter screen. You want to read display carefully. The numbers show the resistance value in ohms. Some multimeters show extra letters like "K" for kilo-ohms or "M" for mega-ohms. These letters help you understand the scale of your measurement.
When you measure resistance, pay attention to the units. If your display shows "00.1" with an "M" annunciator, you have 100K ohms. If you see "00.1" with a "K," you have 100 ohms. If there is no letter, you have 0.1 ohms. Use this table to help you interpret the results:
| Display | Annunciator | Interpretation |
|---|---|---|
| 00.1 | M | 100K ohms |
| 00.1 | K | 100 ohms |
| 00.1 | (none) | 0.1 ohms |
You need to test a resistor and compare the reading to the value printed on the resistor. If the numbers match, your resistor works as expected. If the value is much higher or lower, you may have a faulty resistor. You should check resistance again to confirm your results.
Note: Always measure resistance with steady hands. If your reading jumps or changes, check your connections and try again.
When you check resistor with multimeter, you learn if your resistor is healthy. You can test a resistor in any circuit, but always follow safety steps. Resistor testing helps you find problems early and keeps your electronics safe.
Get Accurate Readings
Switch Ranges if Needed
You want accurate readings every time you measure resistance. Your multimeter may have different range settings. If your display shows "OL" or a very high number, the range is too low. Turn the dial to a higher range. If the reading is too small or hard to see, switch to a lower range. This step helps you see the value clearly and get accurate readings.
Some multimeters have auto-ranging. These models pick the best range for you. If your multimeter does not have this feature, you must set the range yourself. Start with the highest range, then move down until you see a steady number. This method gives you accurate readings for any resistor.
Tip: Always check your range setting before you start resistor testing. This habit helps you avoid mistakes and keeps your results reliable.
External factors can affect your measurements. High insulation materials or stray currents can cause errors. You can see these common factors in the table below:
| Factor | Description |
|---|---|
| External Interference | Stray currents or electrostatic induction can cause test errors, especially with high insulation materials. |
| Leakage of Test Equipment | Poor insulation in wires can lead to measurement errors. Use high-quality materials for accurate readings. |
You get the best results when you control these factors and use the right range.
Ensure Good Contact
Good contact between your probes and the resistor is key for accurate readings. If the probes do not touch the resistor well, you may see numbers that jump or change. Always press the probes firmly on each end of the resistor. Clean the resistor leads if they look dirty or rusty.
Contact resistance can change your results. The type of probe you use also matters. Some probe materials, like Beryllium-Copper Alloy or Tungsten, have different properties. These differences can affect your readings and the durability of your probes. The table below shows what to watch for:
| Evidence Description | Key Points |
|---|---|
| Contact Resistance | The resistance at the probe and resistor connection can cause errors if not checked. |
| Probe Selection | Different probe materials affect resistance and how long your probes last. |
You can test for good contact by moving the probes slightly and watching the display. If the number stays steady, you have good contact. If it jumps, adjust the probes and try again. This step helps you get accurate readings every time you do resistor testing.
Note: Always keep your hands steady and avoid touching the metal parts of the probes. This practice helps you avoid extra resistance and keeps your measurements true.
Read and Compare Results
Interpret the Value
When you measure resistance, you need to understand what the numbers on your multimeter mean. The display shows the resistance value in ohms. You see this value after you touch the probes to each end of the resistor. If the number matches what you expect, your resistor works well. Sometimes, the display shows "OL" or "1." This means the resistance is too high for the selected range, or the circuit is open.
You can follow these steps to interpret the value from your multimeter:
- Set your multimeter to the resistance (Ω) setting.
- Insert the black probe into the COM port and the red probe into the VΩmA port.
- Touch the probes to both ends of the resistor.
- Read the resistance value on the display. If you see "OL," switch to a higher range.
If you use the continuity test, listen for a beep. A steady beep means the circuit is complete. No beep means there is a break. You use these methods to measure resistance and check if your resistor is healthy.
Tip: Always check the units on your display. "K" stands for kilo-ohms, and "M" stands for mega-ohms. This helps you avoid confusion during resistor testing.
Compare to Expected Resistance
After you measure resistance, you need to compare the result to the value printed on the resistor. Manufacturers set specific resistance values for each resistor. You want your measured value to match the expected value as closely as possible. If the resistance is much higher or lower, your resistor may be faulty.
Here is a table that shows why comparing measured resistance to specifications matters:
| Evidence Description | Purpose |
|---|---|
| Verification that the contact resistance is below pre-specified limits is required. | Ensures quality control at the end of production line testing. |
| Resistance too high means reduced current carrying capability of the cable. | Indicates the need for adherence to manufacturer specifications for optimal performance. |
| Routine preventative maintenance with regular resistance checks is essential. | Ensures longevity and reliability of electrical components in accordance with specifications. |
You can use resistance standards to compare your results. These standards give you accurate values for resistor testing. If you measure resistance and find a big difference, you may need to replace the resistor. Regular checks help you keep your electronics safe and working well.
Note: The four-probe method helps you measure resistance more accurately, especially for low-resistance components. This method reduces errors from test lead resistance.
You keep your circuits reliable when you measure resistance and compare your results to the expected values. Resistor testing helps you spot problems early and maintain quality.
Troubleshoot Resistance Checks
Common Issues
You may run into problems when you measure resistance with a multimeter. Some issues can make your readings wrong or inconsistent. You need to know what causes these problems so you can fix them quickly.
- Measuring resistance on a live circuit can give you invalid results. Any voltage present will affect your reading.
- Lead resistance can change your results, especially when you test sensitive components with low resistance.
- Stored offsets in your multimeter may cause you to misinterpret the actual resistance value.
You might also see strange readings if your connections are loose or corroded. Sometimes, the display shows "OL" for open circuits or "0" for shorted resistors. These signs help you spot faulty resistors during resistor testing.
If you notice readings that jump or do not match the expected value, stop and check your setup. You can avoid mistakes by following each step carefully.
Fixing Measurement Problems
You can fix most measurement problems by checking a few key areas. Start by making sure all connections are tight and clean. Replace any wires or leads that look damaged or rusty. Always calibrate your multimeter before you measure resistance.
- Test the resistance of your probes by touching them together. You should see no more than one ohm.
- Make sure the circuit is powered down before you check resistance. Power can cause inaccurate readings.
- Remove the resistor from the circuit for reliable resistor testing. Other components can affect your results.
If your multimeter does not turn on or the display is dim, check the battery and replace it if needed. Inspect the fuse inside your multimeter. Replace it if it is blown. You should also test the probe leads for faults and swap them out if necessary.
You can identify a faulty resistor by reading its color code and comparing it to your measured value. Set your multimeter to resistance mode, connect the probes, and note the value. If the measured value matches the color code, your resistor is good. If not, you need to replace it.
| Problem | Solution |
|---|---|
| Fluctuating readings | Calibrate multimeter, check connections |
| Dim display | Replace battery |
| "OL" or "0" reading | Remove resistor, check for faults |
| No power | Inspect and replace fuse |
Regular resistor testing helps you catch problems early. You keep your electronics safe and working well when you follow these troubleshooting steps.
You can measure resistance with confidence when you follow a step-by-step guide. Start by powering off the circuit and discharging any capacitors. Insert the leads, select the correct mode, and connect the probes to the resistor. Read the display and compare the value to your expectations. Regular practice with advanced techniques, like optimizing probe placement, helps you improve accuracy. Always remember these safety tips:
- Turn off power before resistor testing.
- Double-check that the circuit is not live.
- Discharge capacitors to avoid shocks.
- Handle your multimeter and leads with care.
You may have questions about test lead resistance or how to subtract lead error. Feel free to share your questions or comments below. Practicing each step in the step-by-step guide will help you master resistor testing and get reliable results every time.
FAQ
How do you know if your multimeter is set to measure resistance?
You see the dial or button set to the Ω symbol. This symbol means the multimeter will measure resistance. Always check the display before you start testing.
Can you test a resistor while it is still in a circuit?
You should remove the resistor from the circuit before testing. Other components can affect your reading. Isolate the resistor for the most accurate results.
What does "OL" mean on the multimeter display?
"OL" stands for "over limit." Your multimeter cannot measure the resistance because it is too high for the selected range. Change to a higher range or check your connections.
Why does the reading change when you move the probes?
Loose or dirty connections can cause the reading to jump. Clean the resistor leads and press the probes firmly. Good contact gives you a steady and accurate measurement.