How to Navigate the Process When Working with a Professional PCB Assembler
When you work with a professional pcb assembler, you begin a process that turns your printed circuit boards from an idea into real things. You will get your pcb files ready and send them in.

When you work with a professional pcb assembler, you begin a process that turns your printed circuit boards from an idea into real things. You will get your pcb files ready and send them in. You will watch each step as your pcb goes through assembly, inspection, and delivery. Good communication helps you know what is happening at each part. If you know what your professional pcb assembler will do, you can keep your pcb project moving and stop delays from happening.
Key Takeaways
-
Make sure your design files are clear and finished before assembly. This helps stop mistakes and saves time. Pick the right parts carefully. This makes your PCB work well, cost less, and follow rules. Watch each assembly step closely. Start with solder paste and end with checking the board. This helps your PCB stay strong and work well. Talk often with your assembler. This helps you know what is happening, fix problems early, and finish on time. Choose an assembler who has certificates and lots of experience. They should check quality and work fast for the best results.
Preparation for PCB Assembly
Design and Documentation
You need to get your design files ready before assembly. Make sure your documents are clear and complete. This helps stop mistakes and keeps things on time.
Here are the main documents you need for pcb assembly:
-
Gerber files show the layers, solder mask, and drill holes.
-
The Bill of Materials (BOM) lists every part and supplier.
-
Schematic diagrams help with electrical connections and stop errors.
-
Assembly drawings show where each part goes and how it faces.
-
Drill files mark the spots for holes and vias.
-
Fabrication drawings tell about materials and mechanical details.
-
Testing specifications explain how to check quality.
You should use standards like IPC-2221 for design and IPC-6012 for quality. These documents and rules help you make fewer mistakes and keep things moving.
Component Selection
Picking the right parts is important for a good pcb assembly. Check each part for size, footprint, and thermal rating. Make sure every part meets rules like RoHS and UL.
When you pick parts, think about:
-
Thermal management so parts do not get too hot.
-
Reliability, like how long parts last.
-
Cost and quality so you do not get bad parts.
-
Using design tools and libraries for good matches.
Good choices now help you avoid problems later.
DFA and File Checks
Check your files for Design for Assembly (DFA) before sending them. Make sure your design fits the assembly process and all files match.
Here is a quick checklist for DFA and file checks:
|
File Type |
Purpose |
|---|---|
|
CAD/Gerber Files |
Show board layers and shapes |
|
BOM |
Lists all components |
|
Pick and Place File |
Gives exact part locations |
|
Solder Paste File |
Marks where solder goes |
|
Assembly Drawing |
Shows placement and orientation |
Tip: Keep your files neat and use version control. This helps you avoid mistakes and keeps the pcb assembly process going well.
PCB Assembly Steps
Solder Paste Application
You start the pcb assembly process by applying solder paste to the pads on your printed circuit boards. This step uses a stencil to place the right amount of paste where each component will sit. The volume of solder paste matters a lot. If you use too much or too little, you can get weak joints or bridges between pads. Research shows that the right solder paste volume helps the solder mix well during reflow. This makes your joints strong and reliable. You can use phase diagrams to pick the best paste for your process, especially if you want low-temperature reflow.
You also need to check the quality of your solder paste application. Studies show that you do not have to inspect every pad to keep quality high. By checking about 60% of the pads, you can still catch most problems and save time. You should also control the temperature and air in your assembly area. Lower oxygen levels help the solder paste wet better and make stronger joints. If you use pastes with delayed melting, you can avoid gaps and other defects. These steps help you get a high yield in your pcb manufacturing process.
Tip: For quick-turn pcb assembly, you can expect the solder paste step to take less than an hour for simple boards. Standard services may take a few hours, depending on the size and complexity.
SMT and Through-Hole Placement
After you apply solder paste, you move to component placement. Surface mount technology (SMT) machines pick and place tiny parts onto the pcb. These machines work fast and can place thousands of parts per hour. For through-hole parts, you or a machine insert leads into holes on the board. SMT works best for small, flat parts. Through-hole works well for larger or heavy parts.
You need to make sure each part sits in the right spot and faces the right way. Good placement helps the next steps in the assembly process go smoothly. Quick-turn pcb assembly lines use advanced machines to speed up this step. You can finish placement in less than an hour for small runs. For larger or more complex boards, this step may take a few hours.
-
Prototyping success rates for this step reach 70-80%, which means most boards pass on the first try.
-
Advanced manufacturing methods can cut your time to market by up to 40%.
Soldering and Cleaning
Next, you solder the parts to the pcb. For SMT, you use a reflow oven. The oven heats the board so the solder paste melts and forms strong joints. For through-hole parts, you may use wave soldering or hand soldering. Automated soldering systems help you get even results and fewer defects.
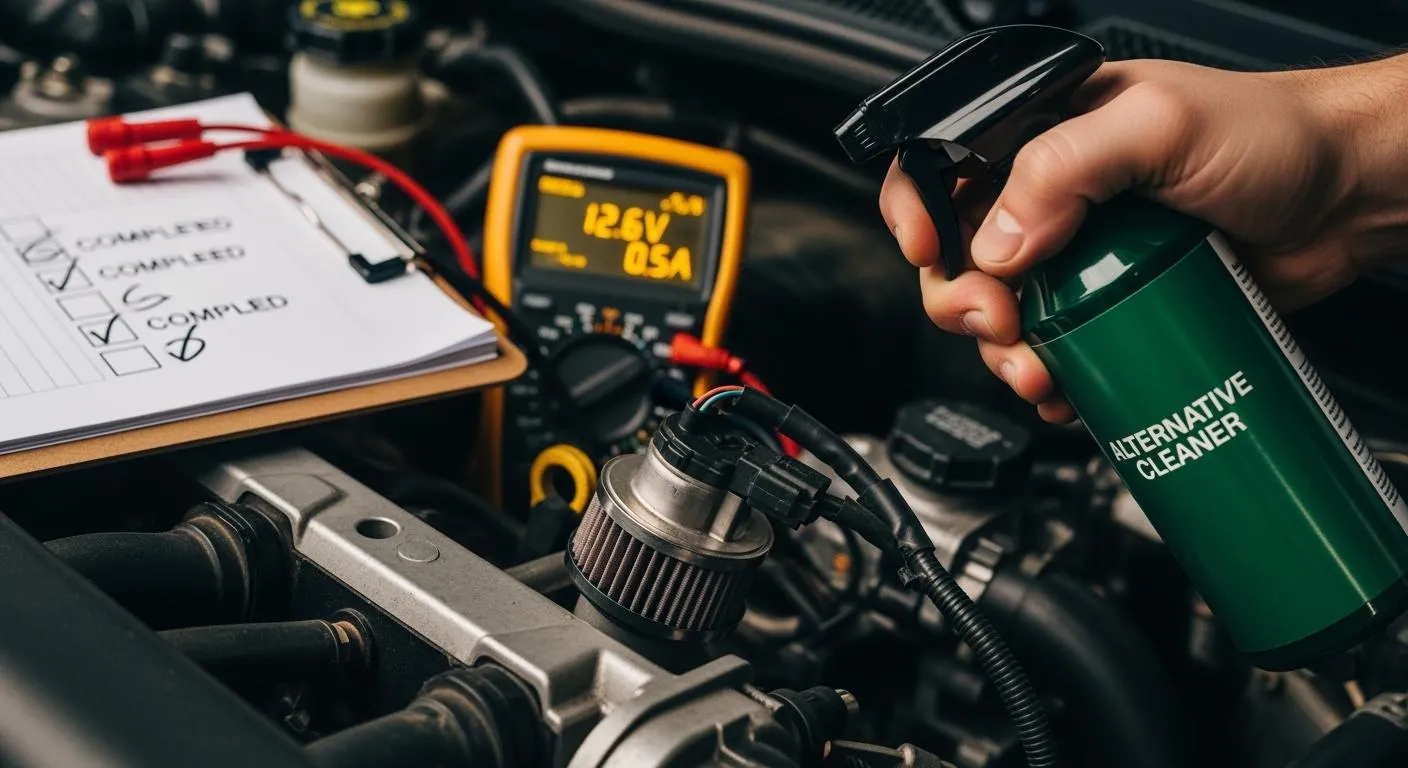
Cleaning comes after soldering. You need to remove any leftover flux or debris. If you skip cleaning, you risk corrosion and poor connections. Start with a visual check for discoloration or damage. Use a multimeter to test for good electrical paths. These steps help you catch problems early and keep your printed circuit boards working well.
Modern soldering and cleaning methods improve your product’s reliability. Lead-free solder needs higher heat, but you can manage this with good process control. Micro-soldering and reflow work well for tiny parts. Tools with stable heat, like T12 or T65 tips, help you make strong joints. These best practices lower your defect rate and boost your assembly yield.
Note: Quick-turn pcb assembly lines can finish soldering and cleaning in 1-2 hours for simple boards. Standard services may take half a day for larger jobs.
Inspection and Testing
You must inspect and test your boards before you finish the pcb assembly process. Inspection checks for defects like bad solder joints, missing parts, or cracks. You use visual checks, X-ray, and automated optical inspection (AOI) to spot problems. AOI systems scan the board and flag issues fast.
Testing makes sure your pcb works as planned. You use in-circuit testing (ICT) to check for shorts, opens, and wrong parts. Functional testing powers up the board and checks if it does its job. Flying probe testers work well for small runs and can find faults without a test fixture.
Key metrics help you track quality:
|
Inspection/Testing Method |
What It Checks |
Quality Outcome |
|---|---|---|
|
Boards passing inspection without rework |
High FPY means few defects |
|
|
Defect Rate |
Errors in finished boards |
Low rate shows good assembly |
|
Mean Time to Failure (MTTF) |
How long the board lasts |
High MTTF means reliable boards |
|
Rework Rate |
How often you fix boards after inspection |
Low rate means efficient assembly |
|
AOI, ICT, Functional Testing |
Solder, placement, electrical, and function checks |
Ensures full compliance and reliability |
-
First-pass yield in top factories can reach 99.97%.
-
On-time delivery rates for rapid prototyping hit 99.2%.
-
Automated inspection and real-time monitoring keep your process fast and accurate.
Tip: For quick-turn pcb assembly, inspection and testing can take 1-2 hours. Standard services may need half a day, depending on the number of boards and tests.
Packaging and Delivery
Once your boards pass all tests, you move to packaging and delivery. Good packaging protects your pcb from static, moisture, and damage during shipping. You use anti-static bags, foam, and sturdy boxes. Efficient packing methods can boost warehouse speed by up to 25% and cut costs by 15-20%.
You want your boards to arrive on time and in perfect shape. Industry data shows that new packaging and delivery methods have raised on-time delivery rates from 85% to 97%. Customer satisfaction scores have jumped by 25%. Lead times have dropped by 30-35%, with most orders now arriving in 4-5 weeks or less.
For quick-turn pcb assembly, you can get your boards in as little as 24 hours for simple jobs. Standard services may take a week or more, based on order size and shipping method.
-
On-time delivery rates in the pcb manufacturing process now reach at least 98%.
-
Production throughput has improved by over 30% with advanced packing and delivery.
Note: Always check your delivery for damage or missing boards as soon as it arrives. Fast feedback helps your assembler fix any issues quickly.
Working with a Professional PCB Assembler
Communication and Timeline
Good communication helps your pcb project stay on track. You should set clear goals for each step. Meet often and give updates to find problems early. This helps you avoid delays. Digital tools let you see progress and get updates fast. Open feedback lets you fix issues before they get worse. Share any schedule changes right away. This builds trust and keeps everyone working together. Teams that talk clearly save money and finish on time. If you do not do this, you may pay more and miss deadlines.
Tip: Use a timeline chart that everyone can see. This helps you follow each step of your pcb assembly.
Quality Assurance
You want your pcb to be good at every step. A professional pcb assembler checks quality many times. They use visual checks, automated optical inspection, and in-circuit testing. Sometimes, they use X-ray and flying probe testers too. The table below lists some ways to check quality:
|
Quality Assurance Measurements |
Description |
|---|---|
|
IPC-A-610 and IPC-A-600 |
These set rules for solder joints and placement |
|
ISO 9001 |
This makes sure the work is always high quality |
|
RoHS Directive |
This limits bad substances in pcb manufacturing |
|
AOI and AXI |
These find problems with placement and soldering |
|
These show results and help you get better |
Always look at inspection reports. These reports tell you what passed and what did not. They help you do better next time.
Common Challenges
You may have problems during pcb assembly. Sometimes, drawings are missing data or are not clear. This can make parts go in the wrong place. If you do not use standard symbols, you can get soldering mistakes and need to fix things. If you forget thermal management, your product can get too hot and break.
Here are some real examples:
-
Teams fixed part placement by making drawings more exact.
-
Using standard symbols and notes stopped soldering mistakes and saved money.
-
Adding thermal relief made products last longer and cut warranty claims.
You can stop these problems by working closely with your pcb assembler. Share clear files and talk often. With quick-turn pcb assembly, you must check every detail. This helps you get good boards fast.
Choosing the Right Assembler
Selection Criteria
You want to find the best partner for your quick-turn pcb assembly. First, check if the assembler has important certifications. Look for IATF 16949 for cars, ISO 13485 for medical devices, and ISO 9001 for quality. These show the assembler follows strict rules and can do tough jobs.
Next, see how they test and build boards. Good assemblers use temperature cycling and vibration tests for car boards. They also do 100% electrical testing. For medical boards, they check if parts are safe for people and can be cleaned well. They follow IPC Class 3 rules and use cross-section checks to make sure every board is great.
Here are some things to look for:
-
Certifications like UL, ISO 9001, ISO 13485, IATF 16949, and IPC Class 3.
-
Modern machines and strong quality checks.
-
Can build tricky designs and do both SMT and THT assembly.
-
Uses AOI, X-ray, and in-circuit testing.
-
Fast work for quick-turn pcb assembly.
-
Clear quotes with no hidden fees.
-
Helpful customer service and good communication.
-
Can track each batch to stop fake parts.
Tip: Always ask for proof of testing and tracking. This helps you trust your assembler and avoid problems later.
Red Flags
Some signs show you should not pick a pcb assembler. Watch for these problems during the process. If you see them, your boards might not work or could be late.
|
Example Problem |
Customer Impact |
Manufacturer Impact |
|
|---|---|---|---|
|
Automatic insertion |
Extra or missing parts |
Board does not work |
Batch needs fixing |
|
Manual insertion |
Wrong or missing parts |
Board fails |
Needs offline repair |
|
Wave soldering |
Solder mistakes, misalignment |
Board fails |
Some rework needed |
|
Visual inspection |
Missed mistakes |
Bad boards shipped |
More fixing to do |
|
Final testing |
Electrical failures |
Scrap or delays |
Lost production |
|
Dispatch |
Delivery delays |
Line stops |
No direct effect |
You should also watch for these problems:
-
Parts that are not straight or are broken.
-
Tombstoning, where parts stand up instead of lying flat.
-
Bad cleaning that leaves stuff behind.
-
Weak testing that misses mistakes.
-
ESD damage from bad handling.
If you see these red flags, talk to your assembler right away. Good communication and quick action help you keep your quick-turn pcb assembly project on track.
When you follow each step in the pcb assembly process, you set your project up for success. Start with strong preparation and clear files. Keep communication open with your assembler. Focus on quality at every stage. Use this process as your guide:
-
You speed up the pcb process and cut lead times.
-
You meet industry standards for quality and safety.
-
You lower costs by reducing errors in the pcb process.
-
You build a strong supply chain for your pcb needs.
-
You get reliable pcb products through careful reviews and testing.
-
You choose skilled partners for a smooth process.
-
You check pcb assembly before reordering to avoid problems.
Tip: Treat this process as a checklist for every pcb project. Careful steps help you get the best results.
FAQ
What files do you need to start PCB assembly?
You need to send Gerber files, a Bill of Materials, pick and place files, and assembly drawings. These files help your assembler build your board correctly and avoid mistakes.
How can you speed up the PCB assembly process?
You can speed up your project by preparing clear files and choosing parts that are easy to find. Ask your assembler about rapid turnaround options if you need your boards fast.
What should you check when your boards arrive?
Check for missing boards, damaged parts, or wrong components. Review the inspection report. If you find any problems, contact your assembler right away.
Can you request changes after assembly starts?
You can ask for changes, but this may slow down your project or add costs. Always review your files before you send them to avoid delays.