Critical Quality Assurance Steps for Controller PCB Assembly in Industrial Applications
You must follow careful quality assurance steps when making controller PCB for factories. First, check the design and look at all parts for problems. Look at each PCB to see if it can be soldered well.
You must follow careful quality assurance steps when making controller PCB for factories. First, check the design and look at all parts for problems. Look at each PCB to see if it can be soldered well. Use machines to find problems early. Watch the process closely and check your suppliers often. This helps you keep your work very good. These steps make bad parts and mistakes less likely. Because of this, you get fewer failures and better control. The numbers show things really got better:
|
Metric |
Before QA |
After QA |
Improvement |
|---|---|---|---|
|
Lot Reject Rate (LRR) |
5500 PPM |
900 PPM |
Reduction of 4600 PPM |
|
Defective PCBs Percentage |
— |
-0.76% |
|
|
Monthly Defect Percentage |
~0.9% |
0.08% |
Up to 0.82% reduction |
A step-by-step way to do quality assurance makes sure each PCB and how it works meet tough factory rules.
Key Takeaways
-
Begin quality checks by looking at the PCB design and parts early. This helps find problems before making the product.
-
Check all parts and suppliers often to stop bad parts from getting in. This also helps make the quality better.
-
Use machines like AOI and X-ray during assembly. These machines help find mistakes fast and lower errors.
-
Test each PCB after it is put together. Use both working and environment tests to make sure it works well in real life.
-
Keep good records and use root cause analysis to fix problems quickly. This helps you keep making your process better.
Pre-Assembly QA
Design Verification
You begin by checking the design and layout of the circuit board. This makes sure the pcb will work in hard factory conditions. You use tests, measurements, and checks to see if the design is right. You look at clearance, trace width, and spacing to keep signals safe. You check where vias and parts are placed to help heat move and signals flow. You also look at how heat is managed and follow EMC/EMI rules. You make sure the pcb can be made easily. You use IPC standards and do stress tests to see if the pcb can last in real life. You plan these checks early to find problems before building starts.
Tip: Try out first boards to check your design. This shows if the process and parts work for you.
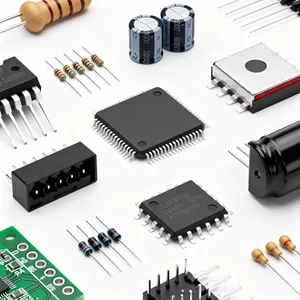
Component Inspection
You must look at all parts before making the circuit board. Incoming quality control checks each part for problems, right values, and correct labels. You use your eyes, tools, and sometimes x-ray or electric tests. You make sure every part fits your design and layout. You look for damage, wrong marks, or bad soldering. This step keeps bad parts out of the build. You also check that parts meet all rules for making and lasting.
-
Check for:
-
Right part numbers and values
-
No damage you can see
-
Good soldering ability
-
Correct packaging
-
Supplier Audits
You need good suppliers for smooth circuit board making. You check suppliers to see how they make things and keep up quality. You look for risks and ways to get better. You use scorecards to track bad parts and how fast they fix issues. You ask for fixes when you find problems. You use controls like checking stats and in-process checks. These steps help you find bad parts early and keep things running well. Over time, checking suppliers gives you better parts, fewer problems, and a stronger pcb.
|
Audit Activity |
Benefit |
|---|---|
|
Supplier Scorecards |
Track bad part rates |
|
Corrective Actions |
Fix problems fast |
|
Process Controls |
Find bad parts early |
|
Continuous Improvement |
Fewer problems, better quality |
PCB Assembly Process QA
Solderability Testing
You begin by checking if pads and leads can be soldered. Solderability testing shows if surfaces will stick together well. This step helps stop cold joints and weak connections. If you skip it, you might get defects that cause failures. You test samples from each batch before moving on. This makes sure poor soldering does not stop the assembly process.
Tip: Always test new batches of components for solderability. This keeps your circuit board manufacturing process steady and lowers rework.
Solder Paste Inspection
Solder paste inspection (SPI) is very important in the pcb assembly process. SPI machines check the amount, height, area, and placement of solder paste. Most SMT defects happen because of bad solder paste printing. Finding these problems early stops bad boards from moving forward. SPI saves time and money by cutting down on repairs and making production faster. You need this step for modern assembly, especially with tiny parts.
Here is a table showing industry benchmarks for SPI:
|
Parameter |
Description |
Typical Acceptable Range |
|---|---|---|
|
Solder Paste Volume |
Amount of paste put on each pad |
|
|
Solder Paste Height |
How thick the paste is on the pad |
130 - 160 micrometers |
|
Solder Paste Area |
How much of the pad is covered by paste |
90% - 100% |
|
Solder Paste Alignment |
How far paste is from the pad center |
Less than 25 micrometers |
You use these numbers to keep your circuit board manufacturing process under control. This step makes sure your assembly process meets quality rules.
In-Process Inspection
You need to check your pcb at every step of assembly. In-process inspection uses machines like AOI and X-ray systems. AOI looks for missing, wrong, or misplaced parts. X-ray finds hidden problems under chips and inside solder joints. These tools help you catch problems before they get worse.
Data shows that using inspection after paste, placement, and soldering drops defect rates from 79 ppm to 15 ppm in one month. Pass rates can go from under 40% to over 80% when you use root cause analysis with inspection data. This proves in-process inspection is a great way to improve quality and lower defects in your assembly process.
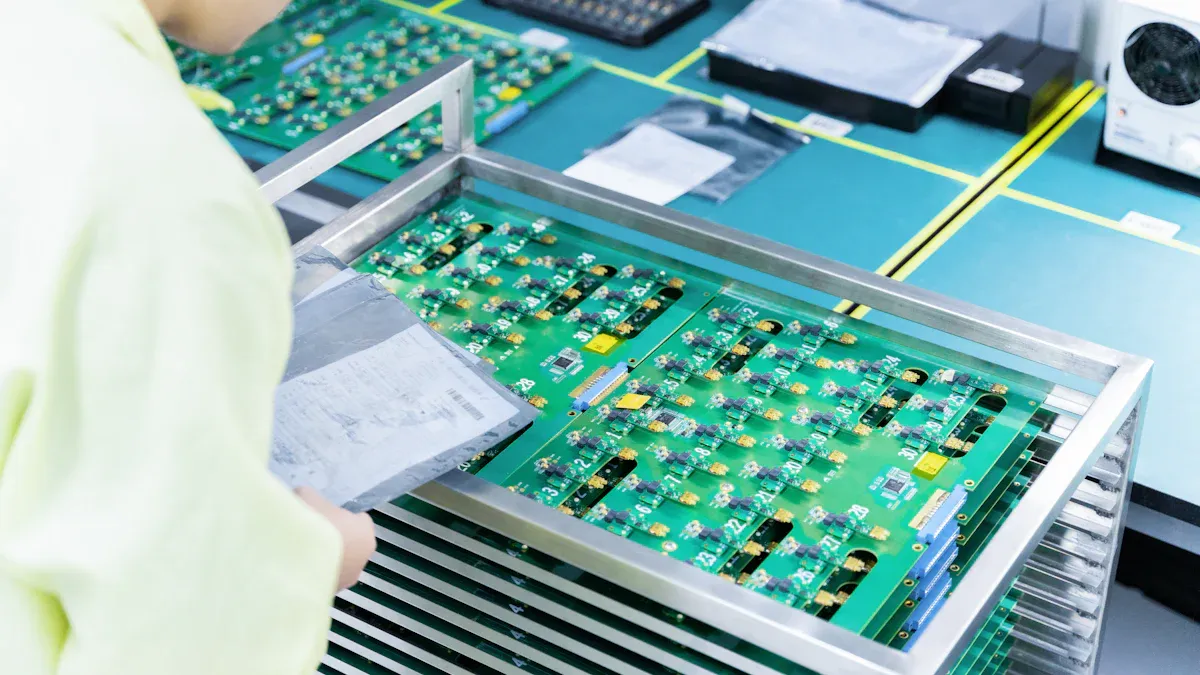
Process Monitoring
You must watch your circuit board manufacturing process as it happens. Process monitoring uses sensors, cameras, and software to track each step. You collect data on temperature, pressure, and material use. Pick-and-Place machines help put parts in the right spot. AOI and AI cameras find defects like solder bridges and missing parts. Closed-loop feedback systems change settings based on sensor data.
-
Key process monitoring actions:
-
Use SPC to watch trends and find problems.
-
Track yield, defect rates, and cycle times with real-time data.
-
Control temperature, humidity, and static to stop process changes.
-
Follow SOPs and do regular quality checks.
AI tools can even guess when a machine might break, so you can fix it before it stops your circuit board manufacturing process. Watching in real time lets you fix problems fast, keeping your assembly process smooth and your pcb quality high.
Quality Control in PCB Assembly
Automated Optical Inspection (AOI)
Automatic optical inspection helps you find problems early. AOI uses special cameras and smart software to check each pcb. It looks for missing, wrong, or bad parts. These machines work much faster than people. AOI can check hundreds of boards every hour. People can only check a few dozen boards in that time. AOI does not get tired, so it always works the same way.
|
Metric |
AOI Performance |
Human Performance |
|---|---|---|
|
Defect Detection |
80-90% detection rate |
|
|
Inspection Speed |
Hundreds to 1000+ boards per hour |
20-50 boards per hour |
|
Consistency |
Consistent 24/7, unaffected by fatigue |
Variable, affected by fatigue |
|
Detail Level |
Detects microscopic defects with micron-level precision |
Limited to visible defects or basic magnification |
|
Data Logging |
Automatic, accurate data collection |
Manual, error-prone and time-consuming |
AOI is easy to set up and change for new designs. It collects data to help you make your process better. Using AOI with other tools can help you find almost all defects. This keeps your pcb assembly strong and working well.
Tip: Use AOI after solder paste printing and after placing parts. This helps you catch most problems before the last step.
X-ray Inspection
X-ray inspection lets you see inside your pcb. You use it to find problems you cannot see with your eyes. It checks for bubbles, empty spots, and bad solder joints under parts like BGAs and CSPs. X-ray is the only way to look inside these hidden places without breaking the board. You can measure empty spots and check how much solder is there.
-
Inline 3D X-ray inspection (AXI) helps you:
-
Find and measure empty spots in solder joints.
-
Check LEDs and other hidden parts.
-
Use software to figure out empty spot sizes and compare solder pastes.
-
Follow IPC rules for empty spot limits, like the 25% rule.
-
Get clear pictures and 3D views to lower mistakes.
-
Connect AXI data with AOI and SPI for better control.
-
Study lots of data to find patterns and improve your process.
-
X-ray inspection helps you make sure your pcb meets tough quality rules. You can find and fix problems before they cause bigger failures.
Electrical Testing
You must test every pcb to make sure it works right. Electrical testing looks for shorts, open spots, missing parts, and wrong connections. You use different tests based on how many boards you make.
|
Testing Protocol |
Description |
Fault Coverage / Success Rate |
Benefits |
Shortcomings |
|
|---|---|---|---|---|---|
|
In-Circuit Testing (ICT) |
Uses nail bed fixtures to test electrical parameters at designated points on the pcb. Suitable for high-volume production. |
Rapid and efficient for mass production; high fault coverage; comprehensive component checks |
High fixture cost; not suitable for low-volume or prototype runs; requires added test points; certain defects like solder voids not detected |
||
|
Flying Probe Testing (FPT) |
Uses robotic arms with probes to test components and connections without fixtures. Ideal for prototypes and low-volume runs. |
Not explicitly quantified but noted as effective |
No fixture cost; adaptable to design changes; wider test coverage including vias and pads; no need for added test points |
Slower and less cost-effective for large-scale production; cannot detect some solder defects |
|
|
Continuity and Isolation Tests |
Verify circuit integrity by checking for opens and shorts using low and high voltage tests respectively. |
Compliance with IPC standards |
Ensures bare pcb trace integrity; detects fabrication defects; essential for quality control |
Limited to bare board testing; does not cover assembled component faults |
In-circuit testing is best for making lots of boards fast. It checks each part and connection very well. Flying probe testing is good for small batches or new designs. Both tests help you find problems quickly and keep your process safe.
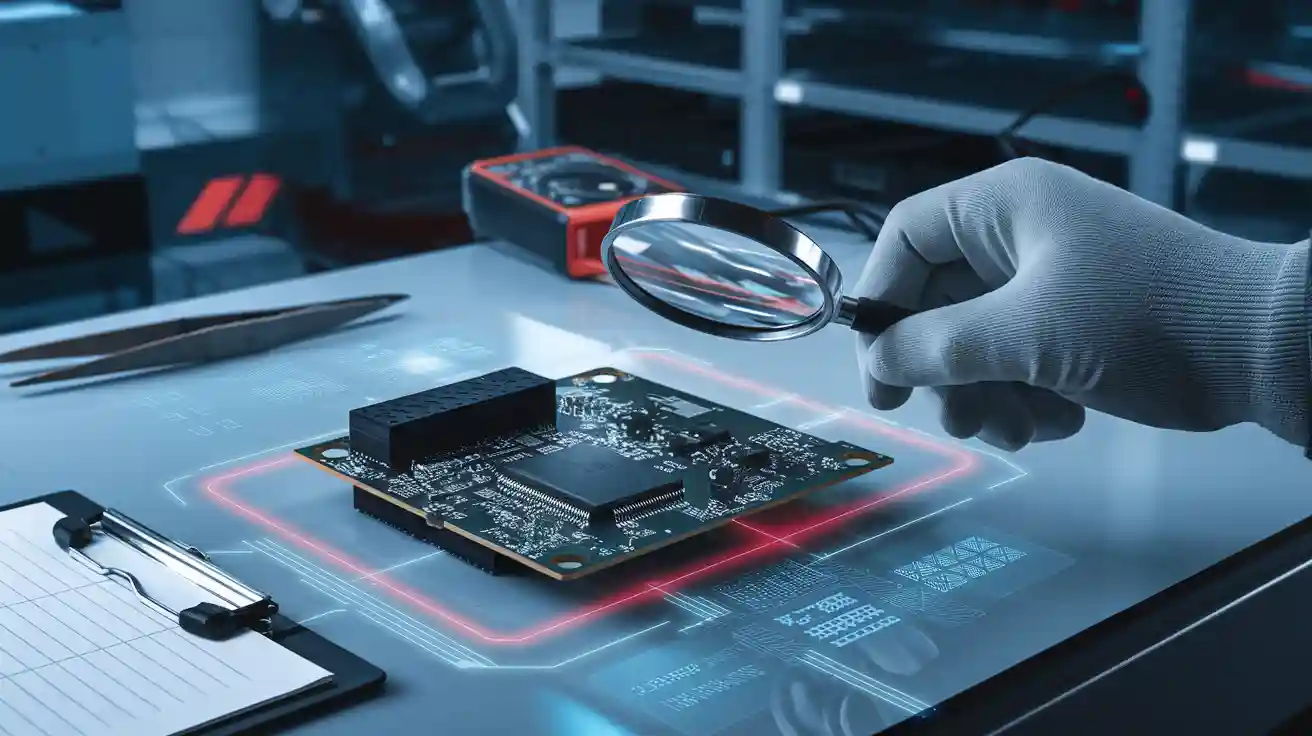
Surface and Microscopic Inspection
You finish by looking closely at the surface and tiny parts of your pcb. This step helps you find very small problems that other tests might miss. You use magnifiers, microscopes, and cameras to check solder joints and leads. You look for cracks, bridges, and other small issues.
|
Metric |
Improvement Value |
Description |
|---|---|---|
|
Defect recognition accuracy |
Increase in overall accuracy of defect detection |
|
|
Mean average precision (mAP) |
+0.19% |
Improvement in precision of detected defects |
|
Recall metrics |
+0.38% |
Gain in correctly identified defects |
|
Real-time detection speed |
15.2 FPS |
Frames per second achieved during detection |
|
Inference speed improvement |
+6.3 FPS |
Speed gain compared to baseline method |
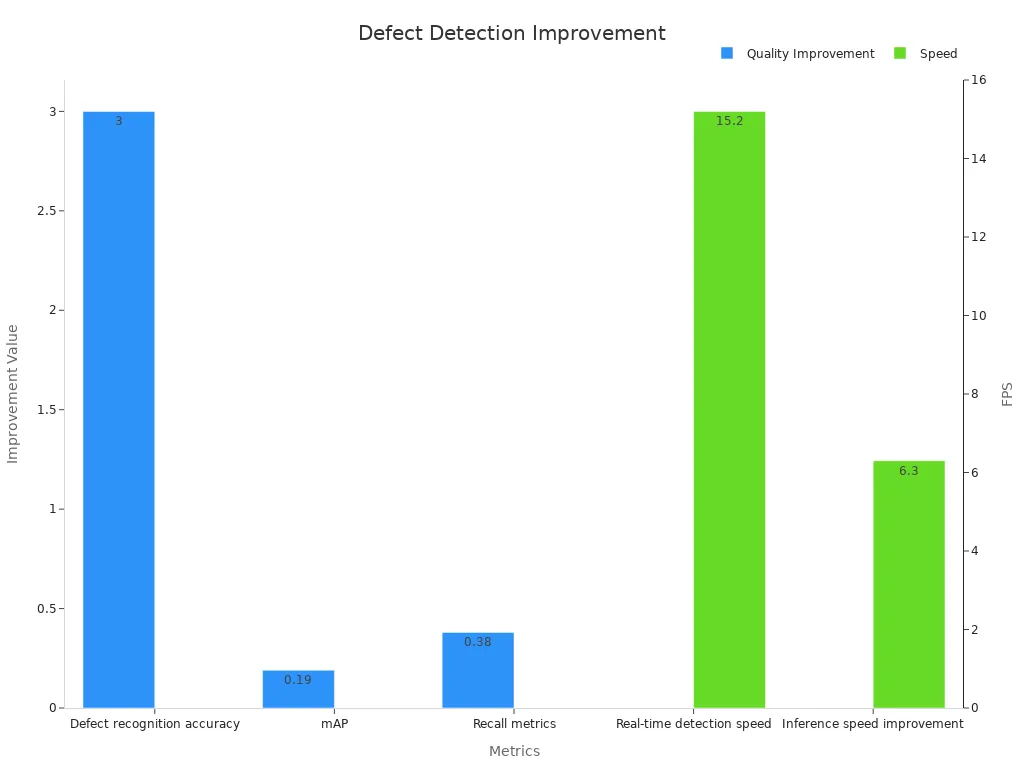
These methods help you find more problems and fix them fast. You can keep your assembly process running smoothly. Surface and microscopic inspection give your pcb one more layer of safety.
Post-Assembly Quality Assurance Steps
Functional Testing
You need to make sure every pcb works as designed. You do this by running a function test on each board. This test checks if the pcb can perform its main job in real-world conditions. You connect the pcb to a test system that simulates how it will work in the field. The function test looks for problems like wrong signals, missing outputs, or slow response. Functional testing can lower the failure rate by a factor of 100, dropping it from 0.03% to 0.0003%. You also see a 30% reduction in field failures and can find up to 70% of possible performance issues. These results show that function tests are key to making your product reliable.
Environmental Testing
You want your pcb to last in tough places. Environmental testing puts the pcb through heat, cold, vibration, and moisture. You use chambers to change temperature and humidity. You shake the pcb to see if it can handle movement. This test helps you find weak spots that could cause failures later. If the pcb passes, you know it can survive in factories, outdoors, or other harsh spots. You keep your product safe and strong by using these tests.
Final Visual Inspection
Before you ship, you look at each pcb one more time. You use your eyes and tools to check for scratches, bent pins, or missing labels. You make sure the board looks clean and matches your standards. This step helps you catch small problems that machines might miss. You can use a checklist to make sure you do not skip anything. A careful final check keeps your customers happy and your brand strong.
Documentation and Traceability
You keep detailed records for every pcb you make. Good documentation helps you track each part and step. You use a bill of materials (BOM) that lists all parts, numbers, and backup options. The BOM also shows part status, ratings, and safety marks. Advanced BOM tools let you compare versions and see where each part is used. You link your BOM to supply chain data for real-time updates on parts and prices.
-
You check incoming materials for key specs like thickness and size.
-
You track each material lot with certificates and storage notes.
-
You use process control charts to watch for changes in making the pcb.
-
You keep records for etching, plating, and drilling steps.
These records help you find problems fast and prove you meet rules. Good traceability means you can fix issues quickly and keep your quality high.
Continuous Quality Improvement
Root Cause Analysis
You have to find out why problems happen in pcb assembly. Root cause analysis helps you stop the same problems from coming back. First, you collect information about the defect. Then, you make a list of all possible reasons for the problem. You look at how each reason could cause the issue. You test your ideas to see which one is right. After that, you fix the problem and check if your fix works.
Tools like Pareto charts and fishbone diagrams make this step easier. These tools help you see which problems happen most often. You can focus on fixing the biggest problems first.
The table below shows how root cause analysis can make quality better:
|
Case Study Description |
Before RCA Implementation |
After RCA Implementation |
Improvement / Impact |
|---|---|---|---|
|
Needle valve components FPY |
97.25% |
~6,000 fewer defective parts per month |
|
|
Engine assembly FPY (Six Sigma DMAIC approach) |
95% |
99% |
Significant reduction in engine rejection rate |
When you use this method, you get fewer repeat problems and more good boards.
Corrective Actions
Once you know the root cause, you need to act fast. You fix the problem so it does not happen again. You might change a step, update a machine, or use a new part. Always check if your fix works by watching the results over time.
-
Steps for good corrective action:
-
Write down the problem and what you did to fix it.
-
Teach your team the new way to do things.
-
Watch to see if the problem comes back.
-
Make more changes if you need to.
-
Acting quickly keeps your pcb assembly line working well. It also helps your customers trust your work.
Training and Optimization
You keep your team ready by training them often. Cross-training lets workers help each other, which cuts downtime by 25%. Hands-on workshops help people learn real skills. Online learning helps everyone stay up to date. When you train your team, you get fewer mistakes and better boards.
|
Training Program / Strategy |
Description |
Demonstrated Outcome |
|---|---|---|
|
Cross-Training Employees |
Training workers in multiple production roles. |
25% reduction in downtime during peak times. |
|
Hands-On Workshops |
Practical skill-focused sessions. |
Enhanced technical expertise. |
|
Online Learning Platforms |
Self-paced e-learning for continuous education. |
Ongoing skill development. |
You also make your process better by tuning machines and using AI tools. For example, changing vision systems helps you find defects faster and more accurately. Companies that use AI for inspection find more defects than people do. These steps help you keep your pcb assembly process strong and dependable.
You learned that every quality assurance step helps your controller PCB assembly. Steps like design checks, part inspection, supplier checks, process watching, and final tests all protect your work. A good QA process stops failures and keeps your products working well in hard places.
-
If you follow these steps, you will:
-
Have fewer defects
-
Make your products last longer
-
Meet important industry rules
-
Remember: Always try to get better and use strong QA. This keeps your assembly process good and your customers happy.
FAQ
What is the most important quality assurance step for controller PCB assembly?
You must focus on design verification first. This step helps you catch errors before production. Early checks save time and money. You build a strong foundation for all other quality steps.
How often should you audit your PCB suppliers?
You should audit suppliers at least once a year. More frequent audits help you catch issues early. Regular checks keep your supply chain strong and reliable.
Why do you need both AOI and X-ray inspection?
AOI finds visible defects fast. X-ray inspection looks inside the board for hidden problems. Using both methods gives you a complete view of quality.
How does environmental testing improve PCB reliability?
Environmental testing exposes your PCB to heat, cold, and vibration. You see how the board performs in tough conditions. This step helps you find weak spots before shipping.
What records should you keep for traceability?
You should keep BOMs, inspection logs, and process control charts. These records help you track every part and step. Good traceability lets you solve problems quickly.