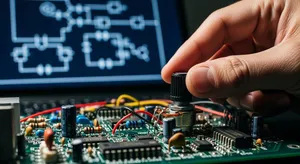
Troubleshooting Issues in Op Amp Integrator Circuits with Solutions and Optimization Techniques
You can achieve reliable and accurate results in op amp integrator circuits by using a systematic approach. Applying feedback mechanisms and automated resetting, such as with MOSFETs, helps stabilize the circuit and allows quick capacitor discharge.
You can achieve reliable and accurate results in op amp integrator circuits by using a systematic approach. Applying feedback mechanisms and automated resetting, such as with MOSFETs, helps stabilize the circuit and allows quick capacitor discharge. These methods reduce output errors and drift, which improves stability and accuracy. In fields like audio processing or medical instruments, these improvements make a big difference. Troubleshooting Issues with a clear process also prevents problems before they affect performance.
Key Takeaways
-
Add a feedback resistor in parallel with the capacitor to prevent output drift and saturation.
-
Use stable power supplies and proper grounding to avoid noise and output errors.
-
Check component values carefully; precision resistors and capacitors improve accuracy.
-
Include an output reset feature, like a switch or MOSFET, to quickly discharge the feedback capacitor and avoid drift.
-
Choose low-offset, low-noise op amps and keep circuit layout clean to enhance stability and performance.
Troubleshooting Issues
When you work with op amp integrator circuits, you often face several common problems. Understanding these issues helps you fix them quickly and improve your circuit’s performance. Experimental studies show that real-world circuits rarely match theoretical predictions because of factors like component tolerances, measurement errors, and loading effects. This makes Troubleshooting Issues a crucial skill for anyone working with these circuits.
Output Saturation
Output saturation happens when the op amp output hits its voltage limits, known as the supply rails. You see this problem when the output voltage cannot go any higher or lower, even if the input signal changes. Older op amps usually saturate within 1-2 volts of the rails, while modern rail-to-rail op amps get much closer. Input offset voltage and bias currents can push the output into saturation, even with no input signal. If you do not use negative feedback, the risk of saturation increases. In practice, you need to watch for slow drift toward the rails, especially in circuits that run for a long time.
Tip: Add a feedback resistor in parallel with the capacitor to help prevent slow drift and output saturation.
DC Offset
DC offset means the output voltage does not return to zero when the input is zero. This problem often comes from imperfections in the op amp’s input stage, such as input offset voltage and input bias currents. These small errors get amplified in integrator circuits, causing the output to drift or stay at a nonzero value. In high-precision or low-level signal applications, DC offset can ruin your results. Some advanced designs use offset cancellation loops to sense and correct DC offset automatically, which greatly improves accuracy and stability.
Power Supply
A stable power supply is essential for reliable op amp integrator circuits. If the supply voltage fluctuates or is noisy, the op amp output can become unstable or saturated. Always check that your power supply matches the op amp’s requirements. Use proper decoupling capacitors close to the op amp pins to filter out noise. Poor grounding or shared ground paths can also introduce unwanted voltage drops, leading to errors in the output.
-
Check for solid ground connections.
-
Use separate analog and digital grounds if possible.
-
Verify supply voltages with a multimeter before troubleshooting other issues.
Component Values
The values of resistors and capacitors in your integrator circuit directly affect its performance. The output voltage depends on the product of the resistor and capacitor values. If these values are not accurate, the integration gain changes, and your output signal will not match the expected result. Even small errors in component values can cause large deviations in output. For example, if you use a resistor or capacitor with a 5% tolerance, your output could be off by the same amount.
|
Aspect |
Relationship / Formula |
Explanation |
|---|---|---|
|
Output voltage ∝ Input current / Feedback capacitor value |
Larger capacitor value reduces output voltage needed for a given feedback current. |
|
|
Unity gain frequency (f_0dB) |
f_0dB = 1 / (2π R1 CF) |
Input resistor (R1) and feedback capacitor (CF) set the frequency where gain = 1. |
|
Cutoff frequency (f_cutoff) |
f_cutoff = 1 / (2π RF CF) |
Feedback resistor (RF) and capacitor (CF) set the low-pass filter cutoff. |
|
DC error voltage (V_error) |
V_error = (RF / R1 + 1) * (V_OS + I_B- * (RF |
Note: Always use precision resistors and stable capacitors to minimize errors. Double-check component values before soldering them into your circuit.
Noise and Instability
Noise and instability can make your integrator circuit behave unpredictably. Low-frequency noise, like flicker noise, affects long integration times. High-frequency noise can disturb short conversion times. The size of your feedback capacitor also changes how sensitive your circuit is to noise. Larger capacitors can pick up more high-frequency noise. The type of op amp matters too. BJT-based op amps often have more current noise at low frequencies, while JFET op amps reduce this problem.
You can improve stability by choosing op amps with unity gain stability and by using compound integrator designs. These designs use two op amps to reduce voltage peaks and thermal feedback. Adding RC damping networks at the input can help reduce spikes, but may slow down the settling time.
-
Use shielded cables for input signals.
-
Keep feedback paths short and away from noisy traces.
-
Place bypass capacitors close to the op amp.
Troubleshooting Issues in op amp integrator circuits often come down to careful checking of DC paths, input bias currents, and grounding. By understanding these common problems and their causes, you can quickly identify and fix faults, making your circuits more reliable.
Step-by-Step Guide
When you face Troubleshooting Issues in op amp integrator circuits, a clear and organized approach helps you find problems quickly. Follow these steps to make your troubleshooting process more effective.
Visual Inspection
Start by looking closely at your circuit. Check for loose wires, cold solder joints, or damaged components. Make sure all connections match your schematic. Sometimes, a simple mistake like a misplaced resistor or a broken trace can cause big problems.
Tip: Use a magnifying glass to spot tiny cracks or solder bridges that are hard to see with the naked eye.
Look for signs of overheating, such as burnt marks or discolored parts. Confirm that the op amp is oriented correctly and that the power supply connections are solid. This first step often reveals the source of many Troubleshooting Issues before you even power up the circuit.
Signal Tracing
After your visual check, use signal tracing to follow the path of your input signal through the circuit. Connect a function generator to the input and set it to produce a small triangular wave, such as 16 Hz with a ±2.5 mV amplitude. This type of signal helps you see how the integrator responds.
Use an oscilloscope to observe the input and output waveforms. Watch for the expected integration behavior. If you see distortion, loss of signal, or output stuck at a rail, note where the signal changes. This method helps you pinpoint where Troubleshooting Issues begin.
Note: A resistor and two diodes in the test setup can protect your integrator and provide a safe DC feedback path during testing.
Faulty Components
If you still see problems, check for faulty components. Measure resistor and capacitor values with a multimeter to confirm they match your design. Replace any part that shows a value outside its tolerance range. Test the op amp by swapping it with a known good one if you suspect it is damaged.
You can also use a switch to control the charging of the feedback capacitor. This lets you test offset correction and see if the output returns to zero when expected. Careful checking of each part helps you solve Troubleshooting Issues and restore your circuit’s performance.
Solutions
Output Reset
You can prevent unwanted drift in your integrator circuit by adding an output reset feature. This method lets you discharge the feedback capacitor when needed. You can use a simple switch or a MOSFET across the capacitor. When you close the switch, the capacitor discharges quickly, and the output returns to zero. This reset action helps you avoid output saturation during long operation or when the input signal has a DC component.
Tip: Use a push-button or an automatic timer to control the reset switch for hands-free operation.
Feedback Resistor
Adding a resistor in parallel with the feedback capacitor improves stability and prevents slow drift. This resistor, often called RF, creates a DC path for input bias currents. You must choose the value of RF carefully. If you use a value that is too high, the circuit may become unstable. If you use a value that is too low, you may lose integration accuracy.
|
Feedback Resistor (RF) |
Observed Effect on Stability and Frequency Response |
|---|---|
|
499 Ω (recommended) |
Stable operation with minimal peaking in frequency response. |
|
1 kΩ |
Slight increase in peaking, still stable with sufficient phase margin. |
|
10 kΩ |
Significant peaking indicating instability and oscillation. |
The table above shows how different RF values affect your circuit. You should start with 499 Ω for most designs. This value gives you stable operation and good frequency response.
Offset Correction
You can reduce DC offset by using offset correction techniques. Many op amps have an offset null pin. You can connect a small potentiometer to this pin and adjust it until the output reads zero with no input signal. Some circuits use an extra resistor at the non-inverting input to balance input bias currents. This method helps you keep the output centered and improves accuracy.
Note: Always check the datasheet for your op amp to find the best offset correction method.
Noise Reduction
Noise can cause your integrator circuit to behave unpredictably. You can lower noise by using shielded cables and placing bypass capacitors close to the op amp. Adding a small series resistor between the op amp output and the capacitive load helps reduce ringing and overshoot. Snubber networks, which combine a resistor and capacitor from output to ground, also help control noise.
Many engineers use these methods in sensitive devices like ECG machines and audio preamps. These solutions have proven effective in real-world tests. You can see less overshoot and more stable signals when you use these noise reduction techniques.
Optimization
Component Selection
You can boost the accuracy and reliability of your integrator circuit by choosing the right components. Look for op amps with low input offset voltage and low drift. These features help keep your output stable over time and temperature changes. Low input bias current also matters because it prevents unwanted signal errors. Precision resistors and stable capacitors make your circuit more predictable.
-
Low offset voltage and drift reduce output errors.
-
Low input bias current keeps your integration accurate.
-
Low noise performance preserves signal quality.
-
Adequate bandwidth and slew rate ensure fast response.
-
Low power dissipation helps in battery-powered designs.
Tip: Texas Instruments and Analog Devices offer op amps like the TLV9161-Q1 and OPA2388-Q1, which meet these benchmarks for precision and reliability.
|
Parameter |
Typical Value |
Why It Matters |
|---|---|---|
|
Offset Voltage |
Reduces error build-up |
|
|
Offset-Voltage Drift |
±0.25 µV/°C |
Keeps output steady with temperature |
|
Bias Current |
±10 pA |
Limits integration error |
|
Noise |
6.8 nV/√Hz @ 1 kHz |
Maintains signal clarity |
|
Common-Mode Rejection |
110 dB |
Blocks unwanted signals |
Circuit Design
Good circuit design helps you avoid common problems. Set the integration time constant (R × C) to match your input signal. Use a feedback resistor in parallel with the capacitor to stop drift and saturation. Make sure your output voltage stays within the supply range. High open-loop gain and wide bandwidth give you accurate integration with less distortion.
-
Add a series resistor to limit current and improve high-frequency response.
-
Use programmable gain if you need to switch between different input ranges.
Note: Reference designs from leading manufacturers show how these choices improve performance and stability.
Layout and Shielding
Careful layout and shielding protect your circuit from noise and instability. Place bypass capacitors close to the op amp pins. Keep feedback paths short and away from noisy traces. Avoid ground planes near input and output pads to reduce stray capacitance.
-
Use shielded cables for sensitive signals.
-
Minimize mechanical stress on the PCB to prevent performance shifts.
Tip: A rigid PCB and proper thermal cycling help maintain long-term accuracy.
Maintenance
Regular maintenance keeps your integrator circuit working well. Check for loose connections and damaged parts. Test your circuit with known signals to spot drift or noise early. Replace aging components with precision parts to keep performance high.
-
Schedule routine inspections.
-
Use evaluation boards to compare your circuit with industry standards.
Note: Consistent testing and care help you catch problems before they affect your results.
You can solve most Troubleshooting Issues in op amp integrator circuits by following a step-by-step process. Start with careful inspection and signal tracing. Use proven solutions like feedback resistors and output reset. Choose quality components and keep your layout clean. Regular checks help you catch problems early. When you use these methods, your circuits will work better and last longer.
FAQ
What causes my op amp integrator to drift toward the supply rails?
You often see drift when input bias currents or DC offsets build up over time. Add a feedback resistor in parallel with the capacitor. This resistor gives a path for small currents and helps keep the output centered.
How do I reduce noise in my integrator circuit?
You can lower noise by using shielded cables and placing bypass capacitors close to the op amp. Keep your feedback loop short. Choose low-noise op amps for best results.
Why does my integrator output not return to zero?
A missing reset feature or DC offset can cause this. Use a switch or MOSFET to discharge the feedback capacitor. Adjust the offset using the op amp’s null pin if available.
Which op amp should I use for high-precision integration?
Pick an op amp with low input offset voltage, low bias current, and low noise. For example:
|
Model |
Offset Voltage |
Bias Current |
Noise (nV/√Hz) |
|---|---|---|---|
|
OPA2388-Q1 |
±210 µV |
±10 pA |
6.8 |
Can I use any capacitor for the feedback path?
No. Use stable, low-leakage capacitors like polypropylene or C0G/NP0 ceramic types. These capacitors keep your integration accurate and prevent drift.