Step-by-Step Guide to CD4017BE Pinout and Circuit Design
The CD4017BE pinout shows you where to connect each wire or part when using the CD4017BE integrated circuit in your project. When you use the CD4017, you work with a decade counter that has 10 outputs.
The CD4017BE pinout shows you where to connect each wire or part when using the CD4017BE integrated circuit in your project. When you use the CD4017, you work with a decade counter that has 10 outputs. You can control lights, motors, or even timing in a circuit with the CD4017BE counter. Many students and hobbyists pick the CD4017BE counter because it is simple and reliable. You will find the CD4017BE counter in LED chasers, sequential lighting, and timing circuits. The CD4017BE counter helps you count from 0 to 9, divide frequencies, and create fun projects.
-
The CD4017BE counter uses CLOCK, RESET, and CLOCK INHIBIT pins to advance counts.
-
You can drive LEDs or other devices using its outputs.
-
It works well in projects that need counting, sequencing, or timing.
Understanding the pinout lets you build circuits with confidence.
Key Takeaways
-
Connect pin 16 to a 3V–15V power supply and pin 8 to ground to keep the CD4017BE stable and noise-free.
-
Use pin 14 as the clock input to advance the count, and pin 15 to reset the counter back to zero when needed.
-
Drive LEDs or other devices from output pins Q0 to Q9, always using current-limiting resistors to protect the chip.
-
Keep wiring neat, use decoupling capacitors near power pins, and double-check connections to avoid common errors.
-
Combine the CD4017BE with a 555 timer to create fun projects like LED chasers that teach timing and sequencing.
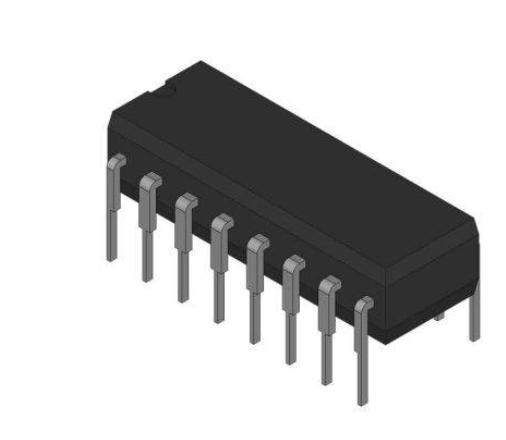
CD4017BE Pinout
Pin Diagram
When you work with the CD4017BE counter, you need to know where each pin goes. The cd4017be pinout uses a 16-pin Dual Inline Package (DIP). Each pin has a special job in your circuit. Here is a simple diagram to help you see the layout:
         +-------------------------+
     VDD |16                 1| Q5
     Q1  |2                  15| RESET
     Q0  |3                  14| CLOCK
     Q2  |4                  13| CLOCK INHIBIT
     Q6  |5                  12| CARRY OUT
     Q7  |6                  11| Q4
     Q3  |7                  10| Q9
    GND  |8                   9| Q8
         +-------------------------+
You can use this diagram to match each pin to its function when you build your circuit. The cd4017be pinout stays the same for all CD4017 series chips, so you can swap them if needed.
Pin Functions
The cd4017be counter gives you 10 decoded outputs, one for each count from 0 to 9. You use these outputs to drive LEDs, relays, or other devices in your circuit. The pin configuration is easy to follow, and each pin has a clear purpose. Here is a table that shows all 16 pins and what they do:
|
Pin Number |
Pin Name / Function |
Description / Functionality |
|---|---|---|
|
1 |
Decoded Output Q5 |
Goes high when the count reaches 5. |
|
2 |
Decoded Output Q1 |
Goes high when the count reaches 1. |
|
3 |
Decoded Output Q0 |
Goes high when the count is 0. Often used for the first LED in a chaser circuit. |
|
4 |
Decoded Output Q2 |
Goes high when the count reaches 2. |
|
5 |
Decoded Output Q6 |
Goes high when the count reaches 6. |
|
6 |
Decoded Output Q7 |
Goes high when the count reaches 7. |
|
7 |
Decoded Output Q3 |
Goes high when the count reaches 3. |
|
8 |
Ground (VSS, GND) |
Connects to 0V or ground in your circuit. Provides a stable reference for the cd4017be counter. |
|
9 |
Decoded Output Q8 |
Goes high when the count reaches 8. |
|
10 |
Decoded Output Q9 |
Goes high when the count reaches 9. |
|
11 |
Decoded Output Q4 |
Goes high when the count reaches 4. |
|
12 |
Carry Out (CO) |
Sends a pulse after every 10 counts. Lets you connect more counters for longer sequences. |
|
13 |
Clock Enable (Clock Inhibit) |
Stops counting when high. Counting works only when this pin is low. |
|
14 |
Clock Input (CLK) |
Advances the count on each rising edge. You connect your clock signal here. |
|
15 |
Reset (RST) |
Resets the count to zero when high. Keeps the cd4017be counter ready to start a new cycle. |
|
16 |
Positive Power Supply (VDD) |
Connects to your positive voltage supply (3V to 15V). Powers the cd4017be counter. |
💡 Tip: Always connect VDD (Pin 16) to your positive supply and VSS (Pin 8) to ground. This keeps your cd4017be counter stable and prevents noise.
Key Pin Roles
-
CLOCK (Pin 14): You send pulses to this pin. Each pulse moves the count forward by one. The cd4017be pinout uses the rising edge of the clock signal to advance.
-
RESET (Pin 15): When you set this pin high, the cd4017be counter resets to zero. Use this pin to start a new counting cycle.
-
CLOCK INHIBIT (Pin 13): This pin lets you pause counting. When high, the cd4017be counter stops, even if clock pulses arrive. When low, counting continues.
-
VDD (Pin 16): This is your positive power supply. The cd4017be pinout works with voltages from 3V to 15V. Most circuits use 5V or 9V.
-
VSS (Pin 8): This is your ground connection. It gives a stable reference for the cd4017be counter and helps reduce noise.
-
Outputs (Pins 1-7, 9-11): These pins go high one at a time as the cd4017be counter advances. You can connect LEDs or other devices to these outputs.
The cd4017be pinout matches other chips in the CD4017 family. You can use the same pin configuration for chips like the MC14017 or HEF4017. This makes it easy to swap chips if you need to.
Features of CD4017BE
You get several useful features of cd4017be in your circuit. The cd4017be counter supports a wide supply voltage, works up to 11 MHz, and has a propagation delay of about 650 nanoseconds. This means you can use it for medium-speed timing and sequencing tasks. The outputs change quickly enough for most LED chasers and display circuits.
⚠️ Note: If you run your cd4017be counter at very high speeds, remember the propagation delay. Too fast a clock can cause missed counts or glitches.
The cd4017be pinout gives you a simple way to build a decade counter circuit. You can use it for LED chasers, timers, and many other projects. The clear pin configuration and reliable outputs make the cd4017be counter a favorite for beginners and hobbyists.
Circuit Connections
Power and Inputs
You need to start by connecting power to your cd4017be counter. The cd4017 works best when you use the right voltage. You can power the cd4017be counter with any voltage from 3V to 15V. Most projects use 5V, but you can go up to 15V if needed. Never use more than 18V, or you might damage the chip.
|
Parameter |
Value |
|---|---|
|
Minimum Supply Voltage |
3 V |
|
Typical Operating Voltage |
5 V |
|
Maximum Supply Voltage |
15 V |
|
Absolute Maximum |
18 V |
Connect pin 16 (VDD) to your positive voltage supply. Connect pin 8 (VSS or GND) to ground. Place a small ceramic capacitor (0.1μF or 100nF) close to the power pins. This helps keep your cd4017be counter stable and stops glitches from power noise.
💡 Tip: Add a second, larger capacitor (like 10μF) near the power supply for extra stability.
For the CLOCK input, you need a clean pulse. Many people use a 555 timer or a microcontroller to send pulses to pin 14. The cd4017be counter advances on the rising edge of each pulse. Make sure your clock signal matches your supply voltage. For example, if you use 5V for power, your clock pulses should also be 0V to 5V.
The RESET pin (pin 15) lets you set the cd4017be counter back to zero. During normal operation, connect RESET to ground. If you want to reset the count, send a high signal to this pin. The cd4017 resets right away, even if the clock is running.
Pin 13 is the CLOCK INHIBIT. Keep this pin low (connect to ground) if you want the cd4017be counter to count normally. If you set it high, the counter will pause and ignore clock pulses.
Here is a step-by-step guide for connecting power and inputs:
-
Connect pin 16 (VDD) to your positive voltage supply (3V–15V).
-
Connect pin 8 (VSS) to ground.
-
Place a 0.1μF ceramic capacitor between pin 16 and pin 8.
-
Connect your clock source to pin 14.
-
Connect pin 15 (RESET) to ground for normal use.
-
Connect pin 13 (CLOCK INHIBIT) to ground for normal counting.
⚠️ Note: Double-check all connections before turning on your circuit. Mistakes can damage your cd4017be counter.
Outputs
The cd4017be counter gives you ten outputs, one for each count from 0 to 9. These outputs appear on pins 3, 2, 4, 7, 10, 1, 5, 6, 9, and 11. Each output goes high one at a time as the cd4017be counter advances. You can use these outputs to drive leds, relays, or other devices in your circuit.
When you connect leds to the outputs, always use a current-limiting resistor. The cd4017be counter can safely supply about 6–7 mA per output. If you try to draw more current, the outputs may not work right, and the chip could overheat. For higher current, use a transistor or a driver chip like the ULN2803 between the cd4017be counter and your leds.
🚦 Tip: Never connect output pins directly to Vcc or ground. This can cause the cd4017be counter to fail.
Here are some tips for wiring the outputs:
-
Use a resistor (330Ω to 1kΩ) in series with each led.
-
Do not short any output pins together.
-
If you need more current, use a transistor as a switch for each output.
-
Label your wires to avoid confusion.
-
Check your wiring against your schematic before powering up.
Common mistakes include connecting output pins directly to power or ground, which can cause the cd4017be counter to overheat. Always check your wiring for shorts or errors. Use a circuit tester if you have one.
You can chain multiple cd4017be counters together for longer sequences. Use the CARRY OUT pin (pin 12) to connect to the clock input of the next cd4017. This lets you build bigger led chasers or more complex decade counter circuits.
✅ Best Practice: After wiring, compare your circuit to the schematic and test each output with a led before running the full project.
By following these steps, you can connect your cd4017be counter safely and reliably. You will avoid common mistakes and get the most from your decade counter in any led or timing circuit.
LED Chaser Example
Schematic
You can build a simple LED chaser using the CD4017BE and a 555 timer. The 555 timer creates clock pulses that move the CD4017BE counter. Each output from the CD4017BE lights up one LED in sequence. This is one of the most popular applications of cd4017be.
Here is a table showing how you connect the main parts:
|
Component/Pin |
Description/Connection |
|---|---|
|
555 Timer IC |
Works as a clock. Output connects to CD4017BE clock input. |
|
R1, RV1 (potentiometer), C1 |
Set the speed of the LED chase. Change these to make the LEDs move faster or slower. |
|
555 Timer Pins |
Pin 8 (VCC) and Pin 1 (GND) go to power. Pin 4 (Reset) goes to VCC. Pin 5 connects to ground with a 0.01μF capacitor. |
|
CD4017BE IC |
Pin 16 (VDD) and Pin 8 (VSS) go to power. Pin 13 (Clock Enable) goes to ground. Pin 14 (Clock Input) connects to 555 timer output. |
|
CD4017 Outputs (Q0-Q9) |
Each output connects to one LED with a current limiting resistor. |
|
LEDs |
Connect to CD4017 outputs. Only one LED lights up at a time. |
|
Resistor R3 |
Limits current to LEDs. |
|
LED D1 |
Shows 555 timer output activity. |
💡 Use a resistor of 1kΩ or higher for each LED. This keeps the current safe for the CD4017BE outputs.
Build Steps
You can follow these steps to make your LED chaser circuit:
-
Gather all parts: CD4017BE, 555 timer, 10 LEDs, resistors (1kΩ or higher), potentiometer, capacitors, breadboard, and wires.
-
Place the 555 timer and CD4017BE on the breadboard.
-
Connect the 555 timer as an astable oscillator. Use R1, RV1, and C1 to set the speed.
-
Connect the 555 timer output to the CD4017BE clock input (pin 14).
-
Connect CD4017BE outputs (Q0-Q9) to each LED. Put a resistor in series with each LED.
-
Connect pin 16 (VDD) and pin 8 (VSS) of both ICs to power and ground.
-
Tie pin 13 (Clock Enable) and pin 15 (Reset) of the CD4017BE to ground for normal operation.
-
Power the circuit with a 9V battery.
-
Turn on the circuit and watch the LEDs light up one by one.
🛠️ Adjust the potentiometer to change how fast the LEDs chase.
Operation
When you power the circuit, the 555 timer sends clock pulses to the CD4017BE. Each pulse moves the counter to the next output. Only one LED turns on at a time. The LEDs light up in order, creating a chasing effect. This is a classic example of the applications of cd4017be in visual displays.
You can see the sequence like this:
-
Second pulse: LED 1 turns off, LED 2 turns on.
-
Third pulse: LED 2 turns off, LED 3 turns on.
-
This continues until LED 10, then the cycle repeats.
The speed of the LED chase depends on the 555 timer settings. Most LED chaser circuits use a frequency of a few hertz, so you can see each LED light up clearly. If you want brighter LEDs, use external transistors, but always keep the current safe for the CD4017BE.
⚡ LED chaser circuits are fun and help you learn about timing and sequencing in electronics.
Troubleshooting

Common Issues
You may face some problems when building circuits with the CD4017BE. Knowing these issues helps you fix your project quickly. Here are some common problems and solutions:
-
Outputs not working or staying high too long:
Check your power and ground connections. Pin 16 must go to the positive supply, and pin 8 must go to ground. If you miss these, the chip will not work. -
Erratic or unstable outputs:
The CD4017BE is sensitive to layout. Messy wiring or a poor PCB layout can cause outputs to behave strangely. Try moving your circuit to a breadboard or proto-board if you see problems. -
Counting errors or skipping outputs:
Make sure your clock signal is clean and stable. Pin 14 should get a clear pulse. Noise or bouncing on the clock line can cause the counter to skip or repeat counts. -
Reset not working:
Pin 15 resets the count. If the counter does not reset, check that this pin is not floating. Tie it to ground for normal use, or send a high signal to reset. -
Multiple outputs on at once:
This can happen if you have wiring mistakes or if the chip is not grounded well. Double-check your connections and use a decoupling capacitor near the power pins.
⚠️ Tip: Always use a 0.1μF capacitor close to the power pins. This helps prevent noise and keeps the chip stable.
Best Practices
You can avoid most problems by following some simple rules. These best practices help your CD4017BE circuit run smoothly:
-
Keep your wiring neat:
Use short wires and avoid crossing them. A clean layout reduces noise and errors. -
Use decoupling capacitors:
Place a 0.1μF ceramic capacitor close to pin 16 (VDD) and pin 8 (GND). This helps filter out voltage spikes. -
Check all connections:
Before powering up, review your wiring. Make sure each pin goes to the right place. -
Grounding matters:
Good grounding prevents erratic behavior. Connect all grounds together at one point if possible. -
Test your clock source:
Use a reliable clock, like a 555 timer. Make sure the clock signal matches your supply voltage. -
Reset and clock enable:
Tie pin 15 (reset) and pin 13 (clock enable) to ground for normal operation. Only pull them high when you want to reset or pause counting.
✅ Note: If you move your circuit from a breadboard to a PCB and see new problems, check your layout and grounding first. Small changes in layout can affect how the CD4017BE works.
By following these steps, you can solve most issues and enjoy reliable operation from your CD4017BE circuits.
To use the CD4017BE in your circuits, follow these key steps:
-
Apply a clock signal to pin 14.
-
Use pin 15 (Reset) to start from zero.
-
Attach your devices to output pins Q0–Q9.
-
Pause counting with pin 13 (Clock Inhibit).
|
Pin |
Function |
Benefit |
|---|---|---|
|
VDD/GND |
Power |
Stable operation |
|
Q0–Q9 |
Outputs |
Control LEDs or devices |
|
CLK |
Clock input |
Timing and sequencing |
|
Reset |
Counter synchronization |
Error prevention |
Understanding each pin helps you design reliable circuits. Try building your own LED chasers or timers. For more learning, explore datasheets, project guides, and tutorials on similar ICs.
FAQ
What voltage should you use for the CD4017BE?
You can use any voltage from 3V to 15V. Most projects work well with 5V or 9V. Always check your power supply before connecting the chip.
Can you connect more than one CD4017BE for longer sequences?
Yes! Use the CARRY OUT pin (pin 12) from the first chip and connect it to the CLOCK input (pin 14) of the next chip. This lets you create longer counting circuits.
How much current can each output drive?
Each output can safely drive about 6–7 mA. You should use a resistor with each LED. For higher current, use a transistor as a switch.
What can you use as a clock source for the CD4017BE?
You can use a 555 timer, a microcontroller, or even a simple push button. The clock signal must match your supply voltage. A clean, steady pulse works best.