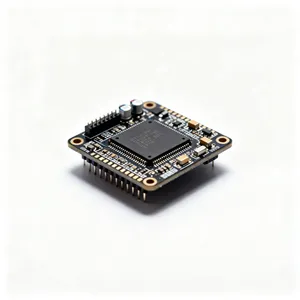
ICM-42688-P Datasheet secrets you should know now
You may miss a key detail in the ICM-42688-P Datasheet. The sensor can change its noise level using register settings. Knowing this helps you make it

You may miss a key detail in the ICM-42688-P Datasheet. The sensor can change its noise level using register settings. Knowing this helps you make it more accurate and use less power. If you look closer, you will see features that fix real problems. Look at the tables and notes carefully. They often have important tips for using the sensor better.
Key Takeaways
The ICM-42688-P sensor can change its noise level. You do this with register settings. This helps the sensor work better. It also uses less power.
Use the 2 kB FIFO buffer to save data well. This lets your system handle information easily. You will not lose important motion data.
Pick the best communication protocol for your project. You can use I3C, I²C, or SPI. This helps you get faster data and simpler wires.
Always use the right register settings. Follow the correct steps to start the sensor. This makes sure the sensor works right. It also helps you avoid common mistakes.
Use the self-test feature built into the sensor. This checks if the sensor works. Do regular calibration for good readings.
ICM-42688-P Datasheet Key Specs
Motion Tracking Capabilities
The ICM-42688-P sensor can track movement in six ways. It has a 3-axis gyroscope and a 3-axis accelerometer. The gyroscope gives you very accurate data with 19-bit resolution. The accelerometer gives you 18-bit data. You can measure tiny movements with this sensor.
Here is a table that lists the main motion tracking features:
Specification | Details |
|---|---|
Device Type | |
Gyroscope | 3-axis gyroscope |
Accelerometer | 3-axis accelerometer |
Data Resolution | 18-bits (accelerometer), 19-bits (gyroscope) |
Maximum Gyro Range | |
FIFO | 2 kB FIFO |
Interrupts | 2 programmable interrupts |
Data Format Support | 20-bits for high-data resolution |
Tip: The FIFO lets you keep more data before you read it. This is helpful if your system reads data slowly.
You can use this sensor for many things. It works in AR/VR, robotics, and IoT devices that need good motion tracking. The ICM-42688-P Datasheet shows it has advanced motion features and events.
Electrical Characteristics
It is important to know the power needs for the sensor. The ICM-42688-P works with many voltages. This makes it easy to use in different devices.
Parameter | Value |
|---|---|
Operating Voltage |
The sensor uses very little power. It has a special wake-on-motion mode that saves battery life in portable devices.
The sensor can talk to hosts in different ways. You can pick I3CSM, I²C, or SPI to connect.
You can use programmable interrupts to control power and data.
Pin Configuration
You need to connect the sensor pins the right way. The ICM-42688-P Datasheet shows you the pinout. Here is a table with the recommended pin setup:
Pin Number | Pin Name | Description |
|---|---|---|
1 | VDD | |
2 | VDDIO | I/O voltage supply |
3 | GND | Ground |
4 | CS | Chip select for SPI interface |
5 | SCL/SCLK | I²C clock / SPI clock input |
6 | SDA/SDI | I²C data / SPI data input |
7 | SDO | SPI data output (optional) |
8 | INT1 | Interrupt 1 output |
9 | INT2 | Interrupt 2 output |
10 | FSYNC | Frame synchronization input |
11-14 | RESV | Reserved (do not connect) |
Note: Do not connect the reserved pins. This keeps your sensor safe and stops errors.
You can use the ICM-42688-P in lots of projects. It works with many communication protocols. The ICM-42688-P Datasheet gives you all the details you need to set up the sensor and avoid mistakes.
Hidden Features in the Datasheet
Configurable Host Interface
You can choose how your device talks to the sensor. The ICM-42688-P Datasheet shows that you can select between I3C, I²C, or SPI. This flexibility helps you match the sensor to your system. If you want fast data, use SPI. If you need simple wiring, pick I²C. The datasheet explains how to set the right mode by using the CS pin and register settings.
Tip: Always check the timing diagrams in the datasheet. These diagrams help you avoid mistakes when you connect the sensor to your microcontroller.
Advanced FIFO and Self-Test
The sensor has a 2 kB FIFO buffer. This feature lets you store lots of data before you read it. You can collect motion data even if your processor is busy. The ICM-42688-P Datasheet explains how to set the FIFO mode and how to read the data safely.
You can also use the built-in self-test. This function checks if the sensor works well. You start the self-test by writing to a register. The sensor then moves its internal parts and gives you a test result. If the result is not in the right range, you know there is a problem.
Here is a simple code example to start the self-test:
// Start self-test
writeRegister(SELF_TEST_REG, 0x01);
Interrupt Functions
You can use two programmable interrupt pins. These pins tell your system when new data is ready or when motion happens. The datasheet lists many events you can use, like data ready, FIFO overflow, or wake-on-motion.
Set up the interrupts by writing to the right registers.
Use interrupts to save power. Your processor can sleep until the sensor wakes it up.
Note: The ICM-42688-P Datasheet gives you a table of all possible interrupt sources. Use this table to pick the best events for your project.
Datasheet Setup and Configuration
Register Settings
You need to set the right registers to make the sensor work well. Registers control how the sensor measures motion, saves power, and sends data. You can find the register map in the ICM-42688-P Datasheet. Each register has a special job. Some control the gyroscope. Others set the accelerometer range or turn on features like self-test.
Here are steps you can follow to set up the registers:
Reset the sensor. Write the reset value to the power management register. This clears old settings.
Set the clock source. Choose the best clock for your system. Most users pick the internal oscillator.
Configure the gyroscope and accelerometer. Set the range and output data rate. Use the right register for each sensor.
Enable or disable features. Turn on the FIFO, interrupts, or self-test if you need them.
Check the status. Read the status register to make sure the sensor is ready.
Tip: Always write to one register at a time. This helps you avoid mistakes.
Initialization Sequence
You must follow the right order when you start the sensor. If you skip steps, the sensor may not work as you want. Here is a simple sequence you can use:
Power up the sensor. Connect VDD and VDDIO to the right voltage.
Wait for the sensor to wake up. Give it a few milliseconds.
Reset the device. Write to the reset bit in the power management register.
Set up the communication protocol. Choose SPI, I²C, or I3C.
Configure the sensor settings. Set the gyroscope and accelerometer ranges.
Enable the data path. Turn on the FIFO or set up interrupts if you need them.
Start reading data. Read the data registers or FIFO.
Here is a code example for initialization using I²C:
// Reset device
writeRegister(0x06, 0x01); // Power management register
// Set accelerometer range
writeRegister(0x14, 0x03); // ±16g
// Set gyroscope range
writeRegister(0x01, 0x00); // ±2000 dps
Note: Always check the datasheet for the correct register addresses and values.
Communication Protocols
You can connect the sensor to your system in different ways. The ICM-42688-P supports three main protocols. Each one has its own strengths. You should pick the one that fits your project best.
Here is a table that shows the protocols and their advantages:
Protocol | Advantages |
|---|---|
I3C | High-speed communication with lower power usage |
I²C | Simple wiring and support for many devices |
SPI | Fast data transfer and full-duplex communication |
If you want fast data, use SPI. If you need simple wiring, I²C is a good choice. I3C gives you speed and saves power. You can set the protocol by wiring the CS pin and setting the right bits in the register.
Tip: Always match the protocol settings in your code with your hardware setup. This helps you avoid communication errors.
You can find more details about protocol setup in the ICM-42688-P Datasheet. Check the timing diagrams and register tables for each protocol.
Optimizing Performance
Accuracy and Stability
You want your sensor to work well every time. The ICM-42688-P sensor helps you get high accuracy and stability. You can make your results better by focusing on a few things:
The sensor gives you data with less noise. This means your data has fewer random errors.
Low sensitivity error lets you measure motion more exactly.
The sensor works well in different temperatures. You can trust your readings in hot or cold places.
The accelerometer and gyroscope have low-noise features. These features help you get steady data even when your device moves fast.
Good thermal stability means your sensor works in many places.
Always check the ICM-42688-P Datasheet for tips. Set the right register values to get the most accurate data.
Power Efficiency
You can save battery life by using power-saving modes. The sensor has a wake-on-motion feature. This lets the sensor sleep until it feels movement. You can lower the output data rate to use less power. If you do not need all the features, turn off the ones you do not use. These steps help your device last longer on one charge.
Tip: Use programmable interrupts to wake your processor only when new data is ready. This helps you use less power.
Temperature Compensation
Temperature changes can change sensor readings. You can use built-in temperature compensation to fix this. The sensor checks its own temperature and adjusts the data. You should read the temperature register and use the correction values. This keeps your measurements right, even if the temperature changes.
For the best results, test your device in real life. See how the sensor works in hot and cold places.
Avoiding Common Pitfalls
Register Misinterpretation
You may find the register map in the ICM-42688-P datasheet confusing at first. Each register controls a different part of the sensor. If you write the wrong value, the sensor may not work as you expect. Many users mix up the addresses or forget to set the correct bits. You should always double-check the register address before you write to it. Read the description for each bit in the datasheet. Some registers need you to write a value in a certain order. If you skip a step, you may not turn on the feature you want.
Tip: Keep a checklist of the registers you need to set. Mark each one as you go. This helps you avoid missing a step.
Timing Issues
Timing problems can cause your sensor to stop working or give bad data. The ICM-42688-P sensor needs you to follow special timing rules, especially when you use I²C. The datasheet says the rise time for the I²C lines must be less than 120 nanoseconds. If the lines rise too slowly, you may see errors. You can fix this by using the right pull-up resistors. Try values like 820 or 600 ohms to meet the timing rule.
Here is a table that shows common timing issues and solutions:
Issue | Details |
|---|---|
I2C Communication Errors | The sensor may show errors if timing is not correct. |
Rise Time Requirement | The rise time must be less than 120 nanoseconds. |
Pull-up Resistor Values | Use 820 or 600 ohms to help the lines rise fast enough. |
Note: Always check your wiring and resistor values if you see strange data or errors.
Calibration Steps
You need to calibrate the sensor to get the best results. Calibration helps remove small errors from the gyroscope and accelerometer. Start by placing the sensor on a flat surface. Let it rest for a few seconds. Read the output values and write down the average. Use these values as offsets in your code. This step helps you get zero readings when the sensor is still.
You should also run the self-test feature. The datasheet explains how to start the self-test by writing to a register. Check the results to make sure the sensor works well. If the values are outside the normal range, you may need to replace the sensor.
Tip: Repeat calibration if you move the sensor to a new place or after a big shock.
You can make the sensor work better if you know the ICM-42688-P Datasheet. Using CLKIN helps you get more accurate ODR. It also lowers sensitivity errors. Your sensor data stays in sync. These steps help you avoid mistakes in navigation, gaming, and robotics. Always look at tables and notes for secret tips. Use what you learn and check the datasheet often for the best results.
FAQ
How do you reset the ICM-42688-P sensor?
You reset the sensor by writing 0x01 to the power management register. This clears all settings. Always check the datasheet for the correct register address.
What is the best way to connect the sensor to your microcontroller?
You can use I²C, SPI, or I3C. SPI gives you fast data. I²C uses fewer wires. I3C saves power. Pick the one that fits your project.
How do you use the self-test feature?
You start the self-test by writing to the self-test register. The sensor checks itself and gives you a result. Compare the result to the datasheet values.
Why does your sensor show strange data?
Strange data often means timing or wiring problems. Check your pull-up resistors. Make sure you set the right register values. Review the datasheet for troubleshooting tips.
Can you use the sensor in hot or cold places?
Yes, you can. The sensor works well in many temperatures. Use the temperature compensation feature for the best accuracy.